
Translating and adapting an asset's metadata and schema
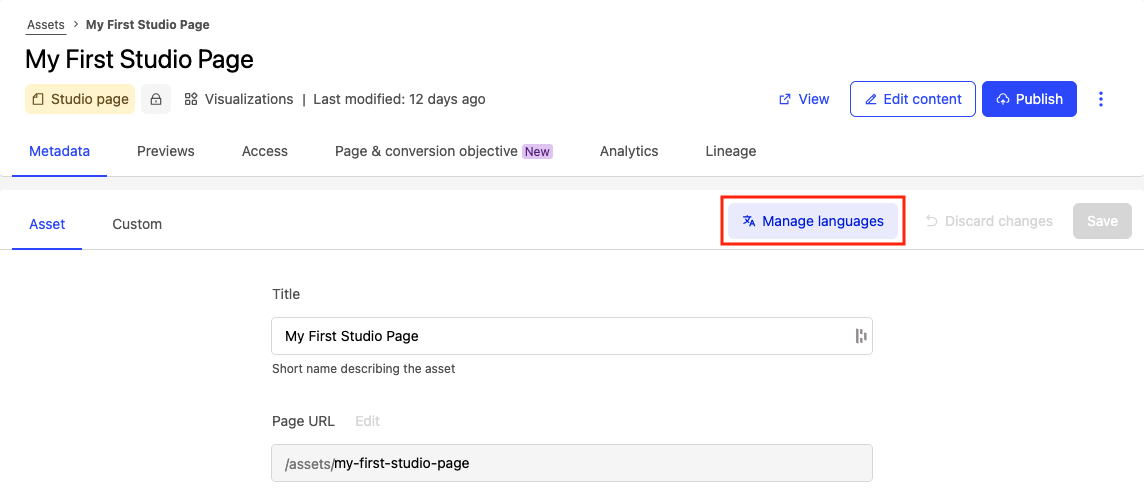
For workspaces with more than one language activated in the portal, you can translate an asset's metadata and (if the asset is a dataset) its schema.
To provide translations, go to the asset's Metadata > Asset tab and click on Manage languages.
For a dataset's schema, go the the dataset, edit its content, and on the Schema tab click on Manage translations.
For datasets specifically, you can also choose to display certain schema fields only in specific languages, instead of translating them — a different mechanism, covered at the end of this article.
Note that this article covers translation and per-language field display for one asset at a time. For the full picture of how languages work across your workspace, see Working with a multilingual workspace.
Translating an asset's metadata
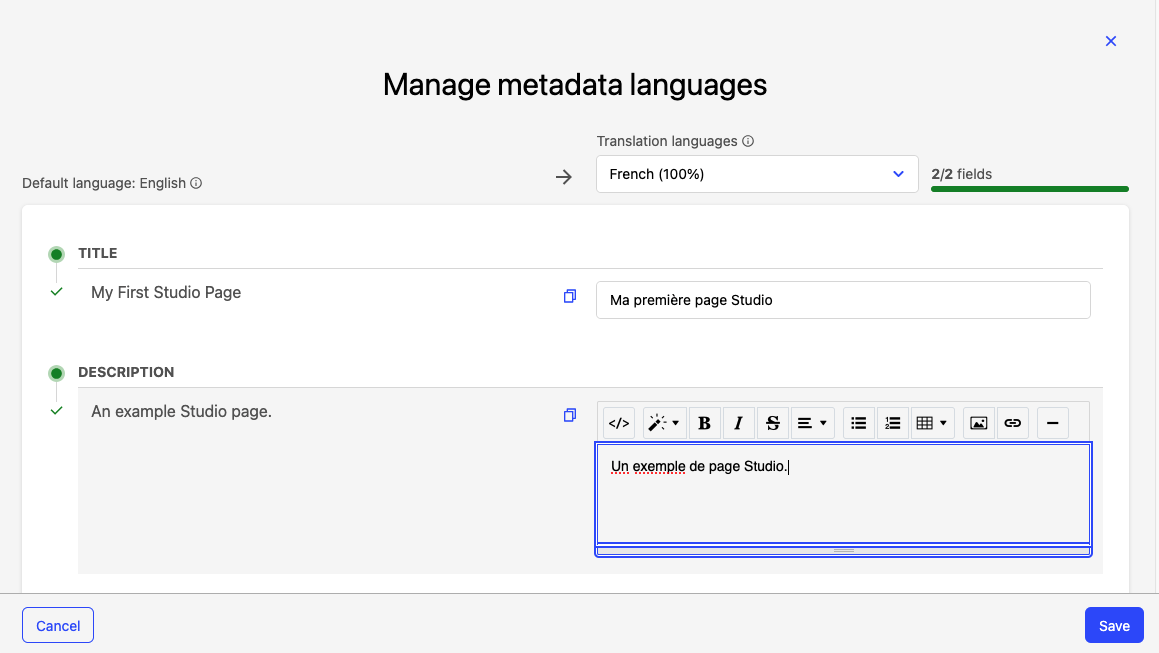
For each language available in your portal, you can translate the standard metadata — title, description, themes, keywords, category, and creator — as well as any custom metadata.
To start translating chosen elements from the dataset, go to the asset's Metadata > Asset tab and click on Manage languages. A translation interface appears.
Note that the translation interface only proposes for translation elements that have already been configured in the original language on the Asset tab. For example, until the "Description" has been defined in the original language, it will not appear among the fields to be translated.
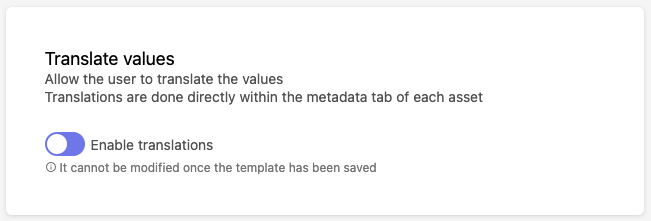
Regarding custom metadata templates, the metadata in these must be defined as "translatable" when the template is created. This unfortunately cannot be changed once the field has been created, so if it's not the case you must create a new metadata field.
Select the language you wish to translate into in the drop-down menu at the top. The left side of the translation interface displays the elements that can be translated, and you write your translations in the boxes on the right.
Note that the boxes contain no text, but display an indication of their value in the original language. If you don't wish to add a translation but simply reuse the original value, click on the copy button to the left of the box to autofill it with the original value.
A progress bar is displayed to indicate how many of the metadata fields remain to be translated in the selected language.
Once you're done, don't forget to Save and eventually Publish the changes.
Note that if you edit an element's value in the original language after translating it, its translation is flagged as out of date. The portal then displays the original-language value, even though the previous translation still appears in the translation interface. To display the translation again, click Manage languages, update the element's translation, then Save and Publish your changes.
Regarding interoperability metadata
By definition, these templates rely on controlled vocabularies and standardized values, so are not able to be defined by individual users. Where possible, Huwise manages the translation of these predefined values so that the metadata is correctly displayed and exported in the portal's language.
Translating a dataset's schema
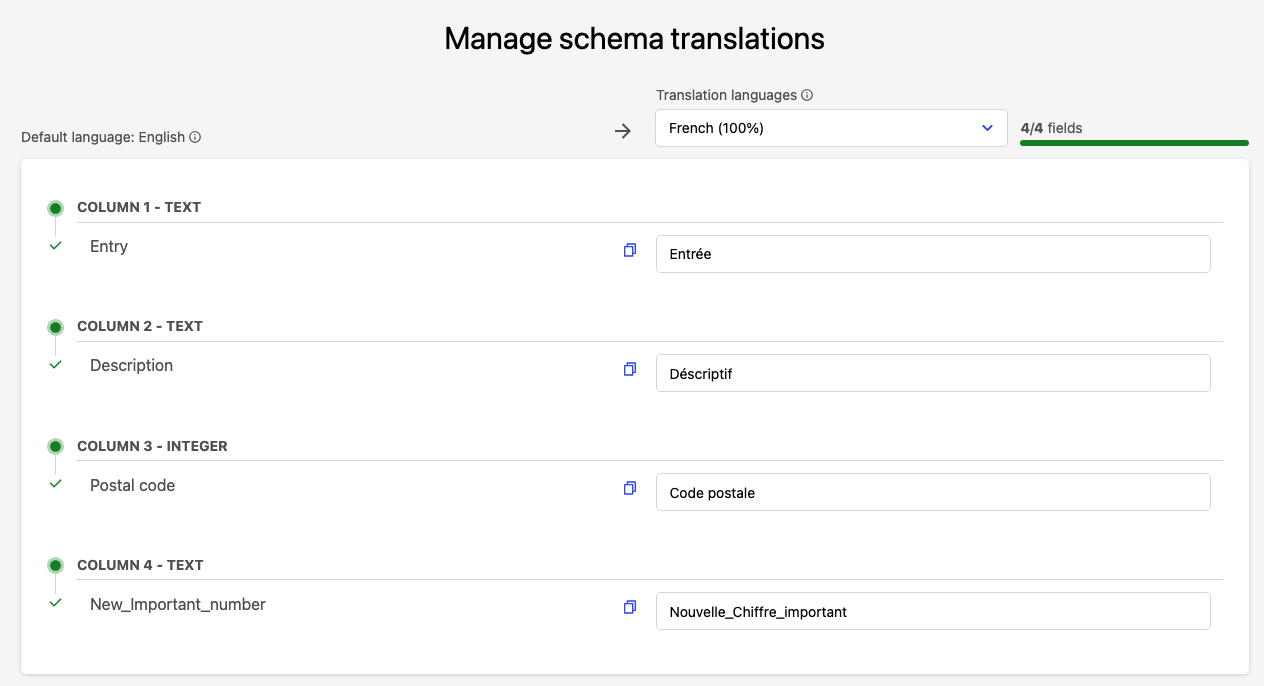
You can provide translations of a dataset's schema for all of the languages in your portal.
To begin translating a dataset's schema, go the the dataset, edit its content, and on the Schema tab click on Manage translations. A translation interface appears.
Select the language you wish to translate into in the drop-down menu at the top. The left side of the translation interface displays the elements that can be translated, and you write the translations in the boxes on the right.
Note that the boxes contain no text, but display an indication of their value in the original language. If you don't wish to add a translation but simply reuse the original value, click on the copy button to the left of the box to autofill it with the original value.
A progress bar is displayed to indicate how many of the schema fields remain to be translated in the selected language.
Once you're done, don't forget to Save and eventually Publish the changes.
Displaying fields by language
Translating a field and displaying a field by language solve two different needs. Translation applies to a single field, shown with a different value in each language.
Displaying by language does something else: you choose which languages a given field appears in at all, without translating it — useful when your dataset already has a separate column per language for the same kind of information, such as job titles in English and in French.
This doesn't change the underlying data. It only affects how the dataset is displayed on your portal, and how it's returned by the Explore API when a request includes the lang parameter.
To configure this, in your back office go to your dataset and open the Exploration Settings tab. Toggle "Define fields for a specific language."
Then, for each field you want to restrict:
Rollover the field you wish to modify, and click the edit icon on the right.
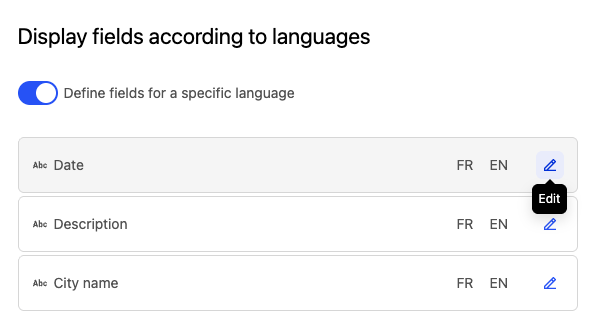
Toggle the languages you want that field to appear in on or off.