Configure your asset page
This page focuses on how you, as a data publisher, can enhance your data discovery process.
You may have a specific goal for each of your assets. For some, you may want users to download the data. For others, you’ll guide them directly to custom views. Sometimes it’s best to highlight metadata first; in other cases, to put attachments up front. Finally, you can add up to three of your own custom CTAs (calls to action).
In short, each asset can be tailored to help the user find what they need—and help you to make sure they get there.
In the asset manager, you can customize the following:
The call to action (CTA) the user sees first
The information available about the asset
The order in which this information appears (the layout)
Related elements such as attachments, showcases, and similar assets
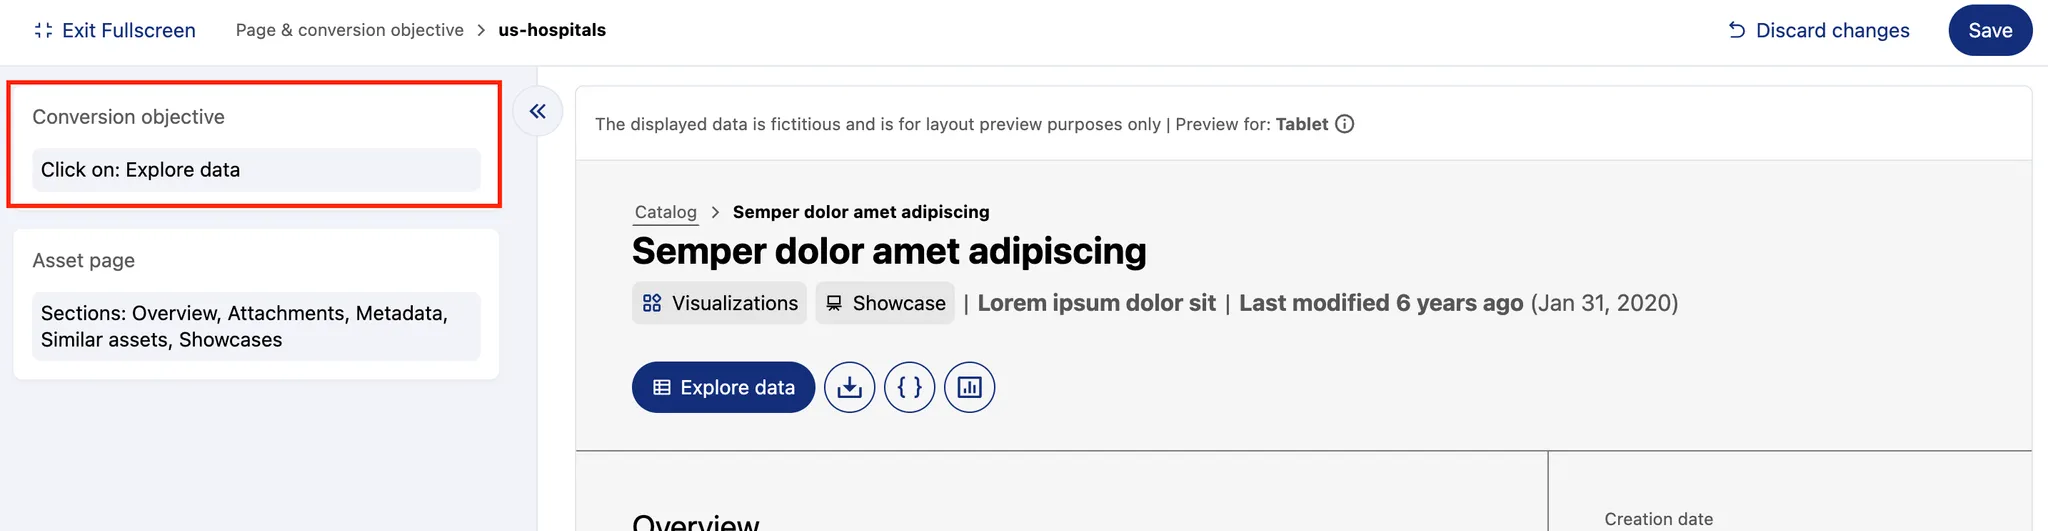
To get started, go to your asset management view and open the Page & conversion objective tab.
Choose your conversion objective
The ultimate goal of an asset is its consumption. Conversion shows whether that consumption happens. You want users to take action—download the data, explore custom views, or interact in another way. By setting a conversion objective, you define the main action that drives your funnel.
The following actions are available for datasets:
Explore data lets users view the dataset in the table format
Export data allows downloading the dataset in available formats
Use API console opens an interface where users can generate a request URL and use it in external apps
Show views opens custom views of a dataset if set up
Up to three custom CTAs, based on links and labeling you provide
For visualizations:
Show page opens the Studio or Code editor page
Export page (soon) will allow you to download the visualization in PNG, CSV, JSON, and .xlsl formats
And for external assets:
Open in tool will open the external asset in its original platform (such as Power BI, for example). Note that assets from Snowflake can be viewed via Explore data button, just like the datasets.
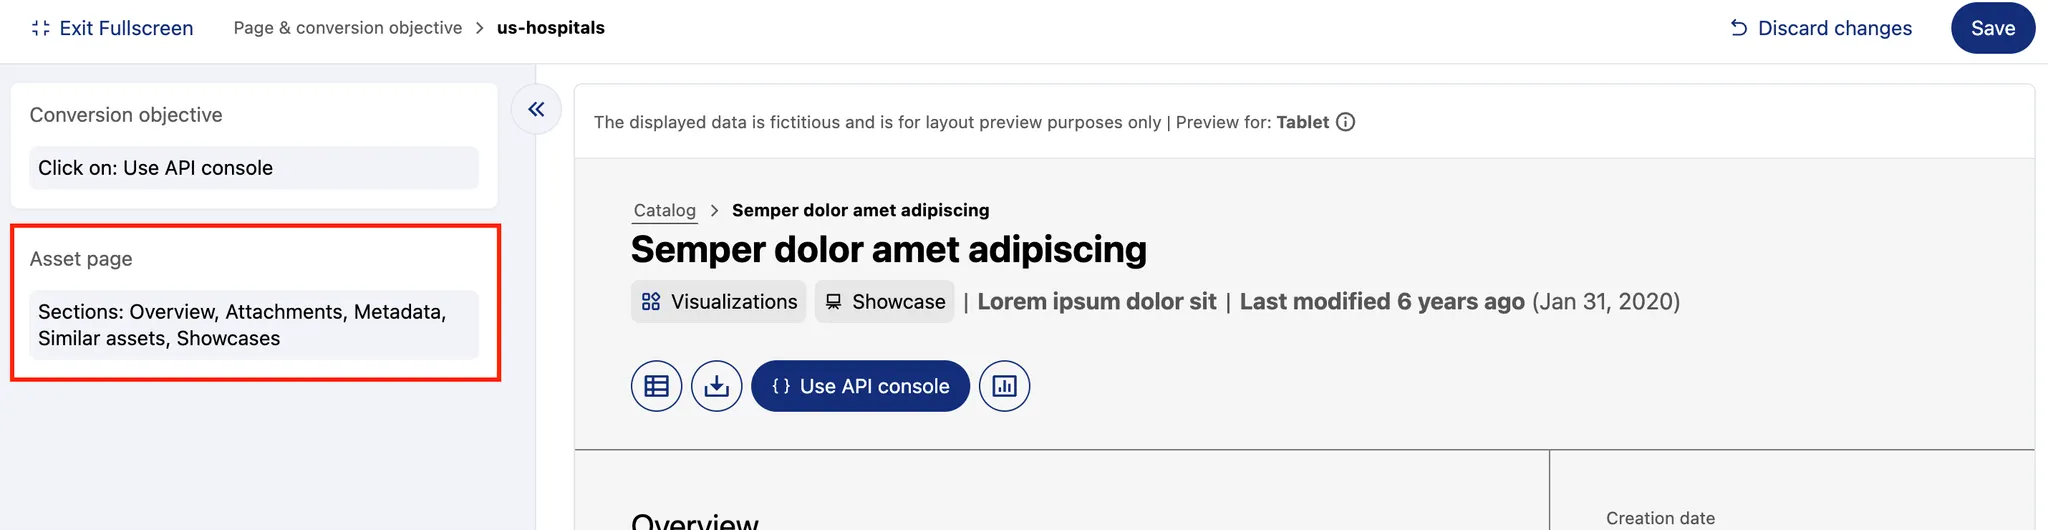
As an asset publisher, you want to define a conversion objective: the main call-to-action (CTA). This reflects what you expect users to do with the asset. For example, if the asset is a dataset of real-time public transport schedules and your main users are developers integrating it into their apps, the best objective might be Use API console.
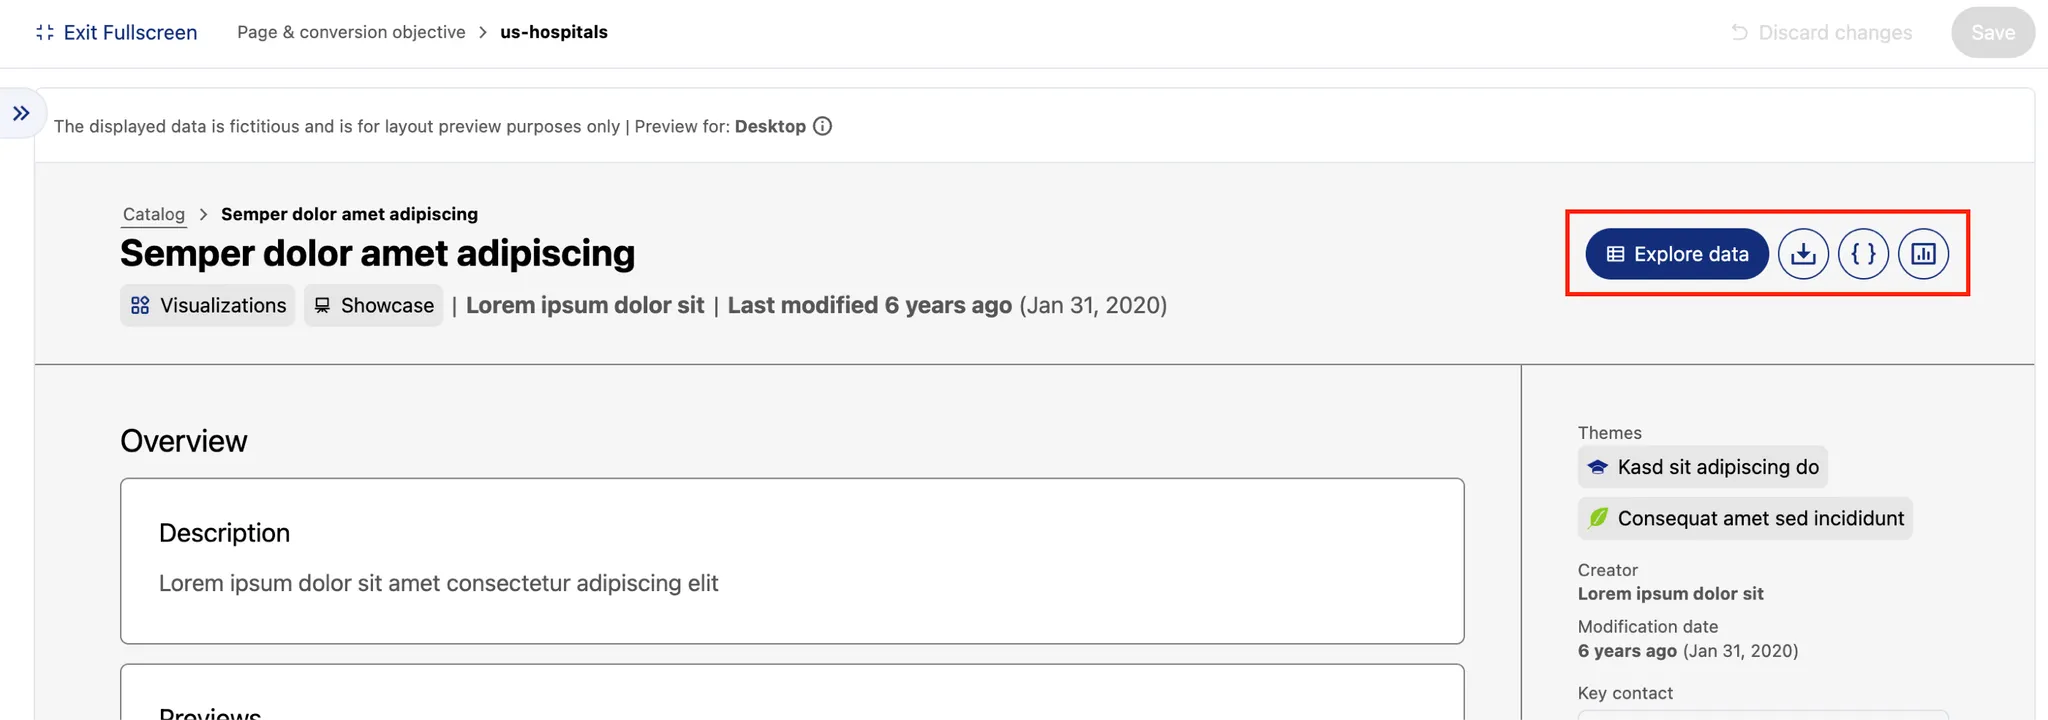
The default CTA for datasets is Explore data. To change it, click on Conversion objective.
Then, select your conversion objective. For a consistent user experience, buttons always display in the same order, but the main CTA is highlighted in your chart’s primary color.
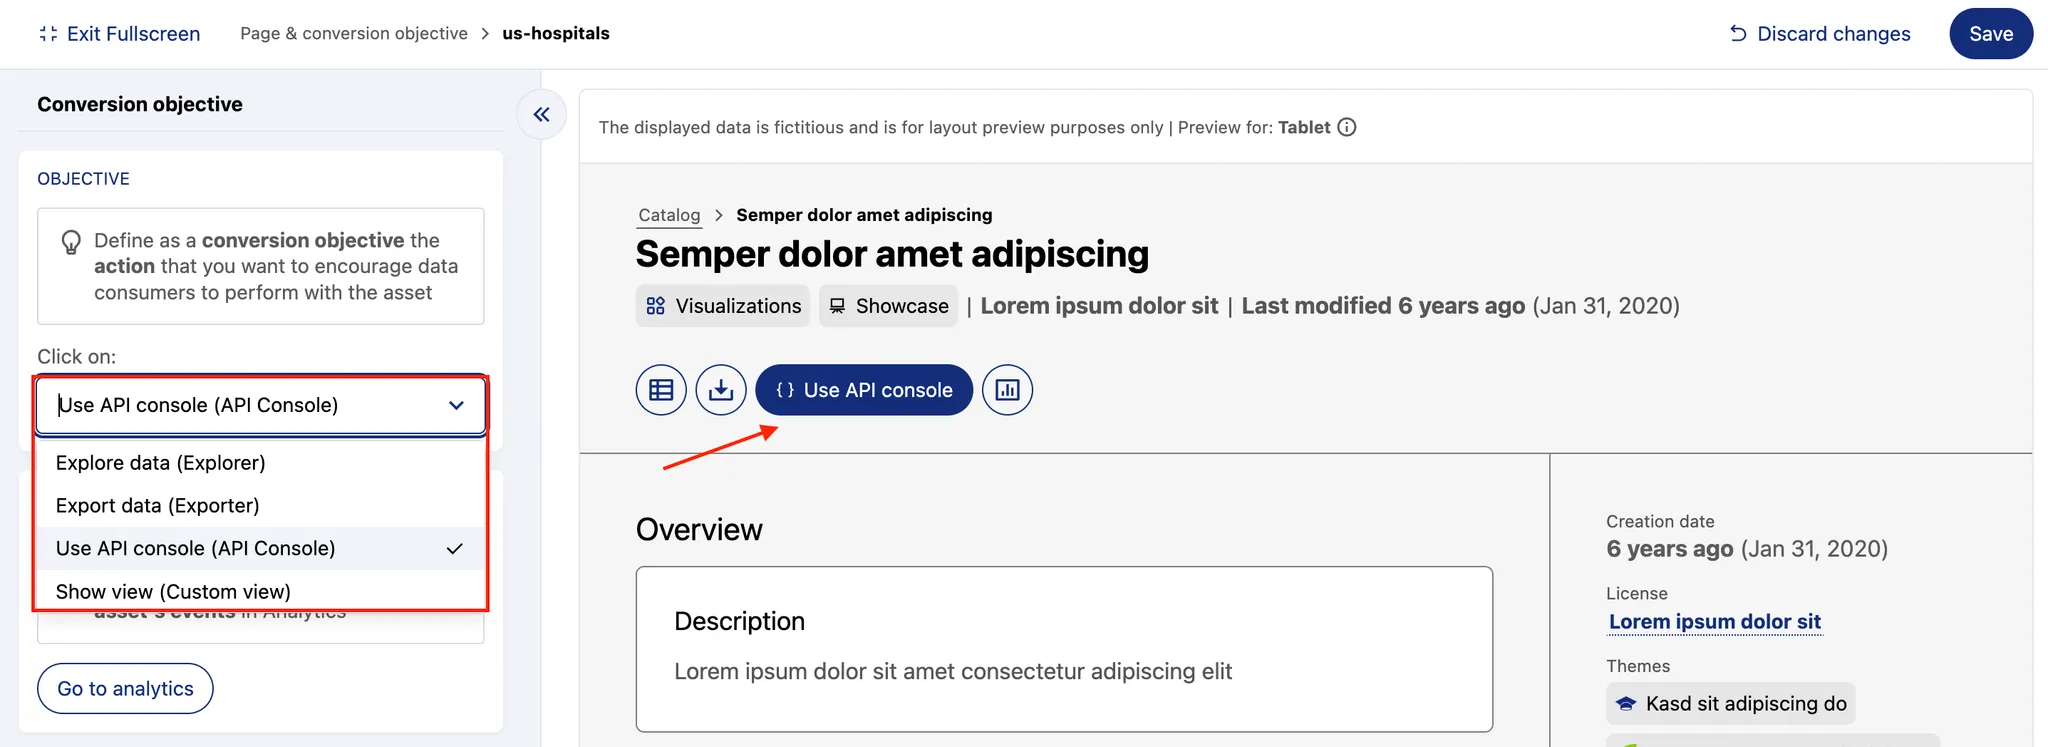
Note that Show view option will be grayed out if no custom views exist. If this CTA is selected but all custom views are deleted, you will see an alert that you custom view page is empty. Don’t forget to update the CTA!
Adding custom links
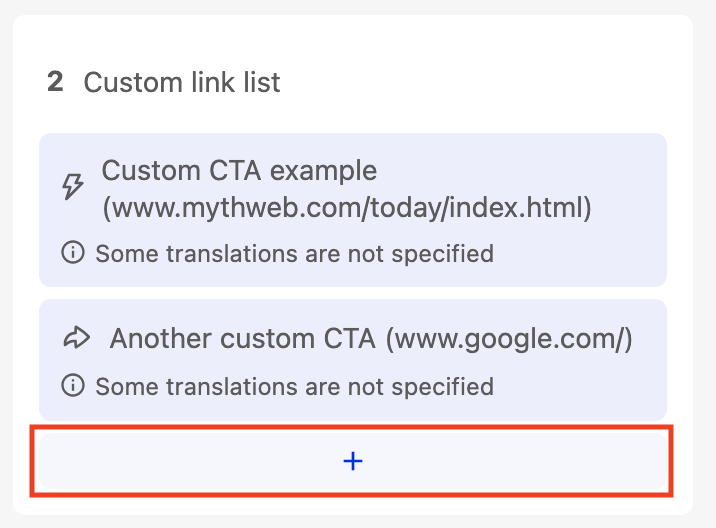
Roll over the "Consumption tool buttons" and click on the edit icon. Under "Custom link list," click on the plus bar.
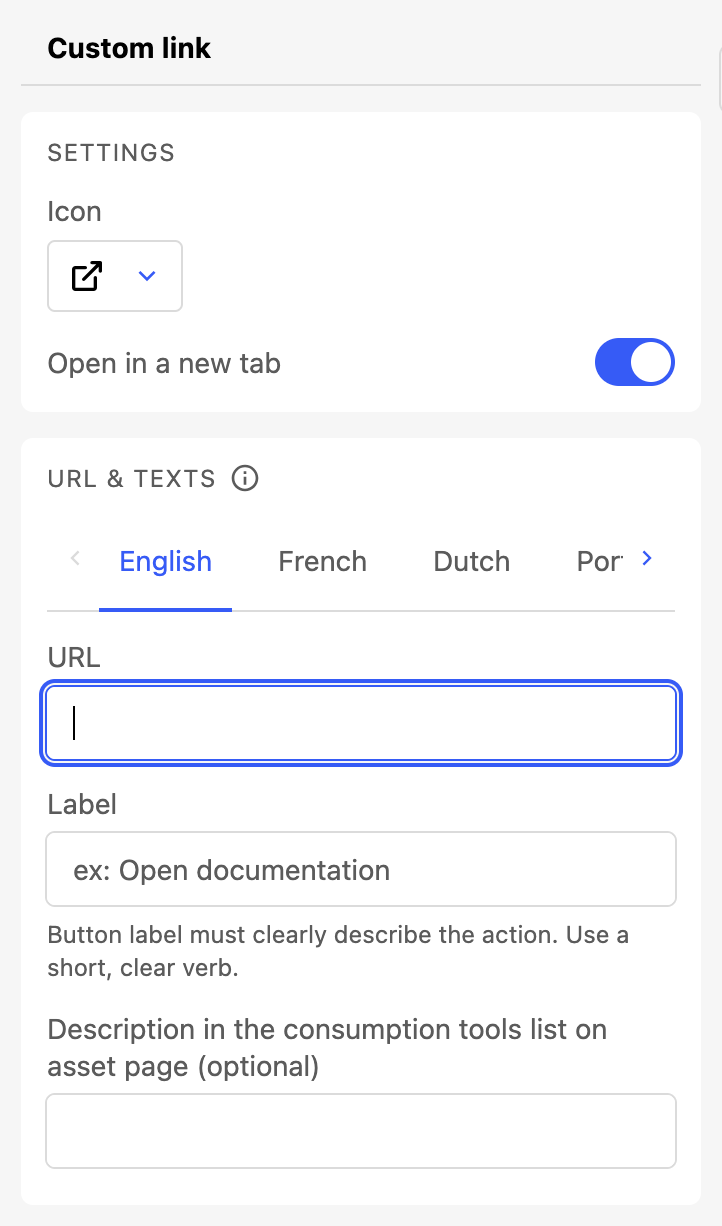
This will open an interface that allows you to:
Define the icon for the button
Toggle if the link should open in a new tab or not
Define the URL, the label, and a short description.
Note that if your catalog supports multiple languages, you can define these values per language. Any label or description without a translation will use the corresponding value in the portal’s default language.
Note that once you have defined custom links, you can select these under the "Conversion objective."
Remember that the changes you make are visible in the preview to the right, and to save and publish any changes you make.
Build your layout
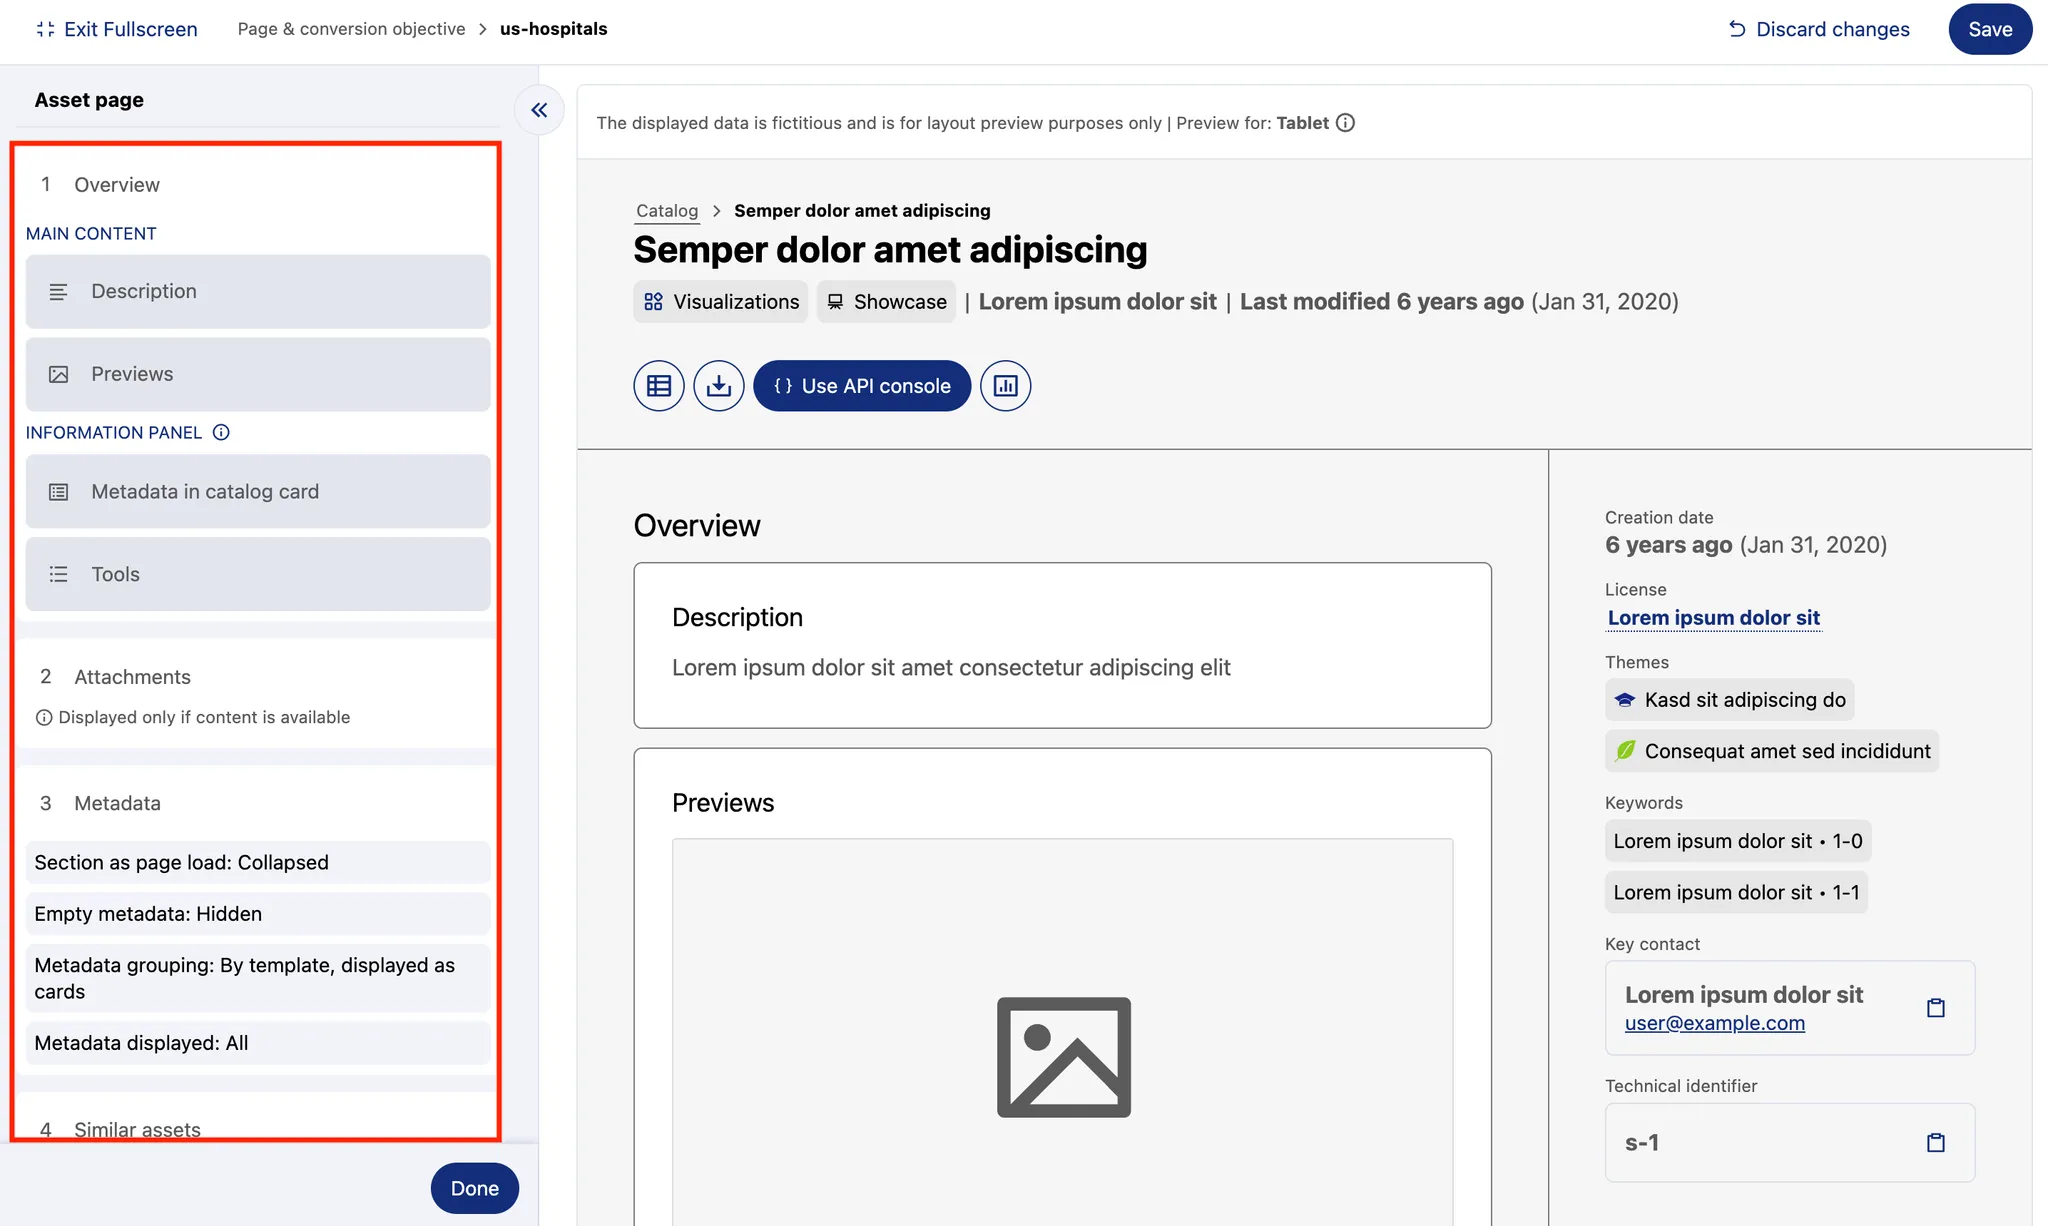
To customize your layout, go to Asset page.
Then use the panel on the left to toggle or reorder the page elements.
Certain elements are essential for understanding an asset. They are always displayed by default:
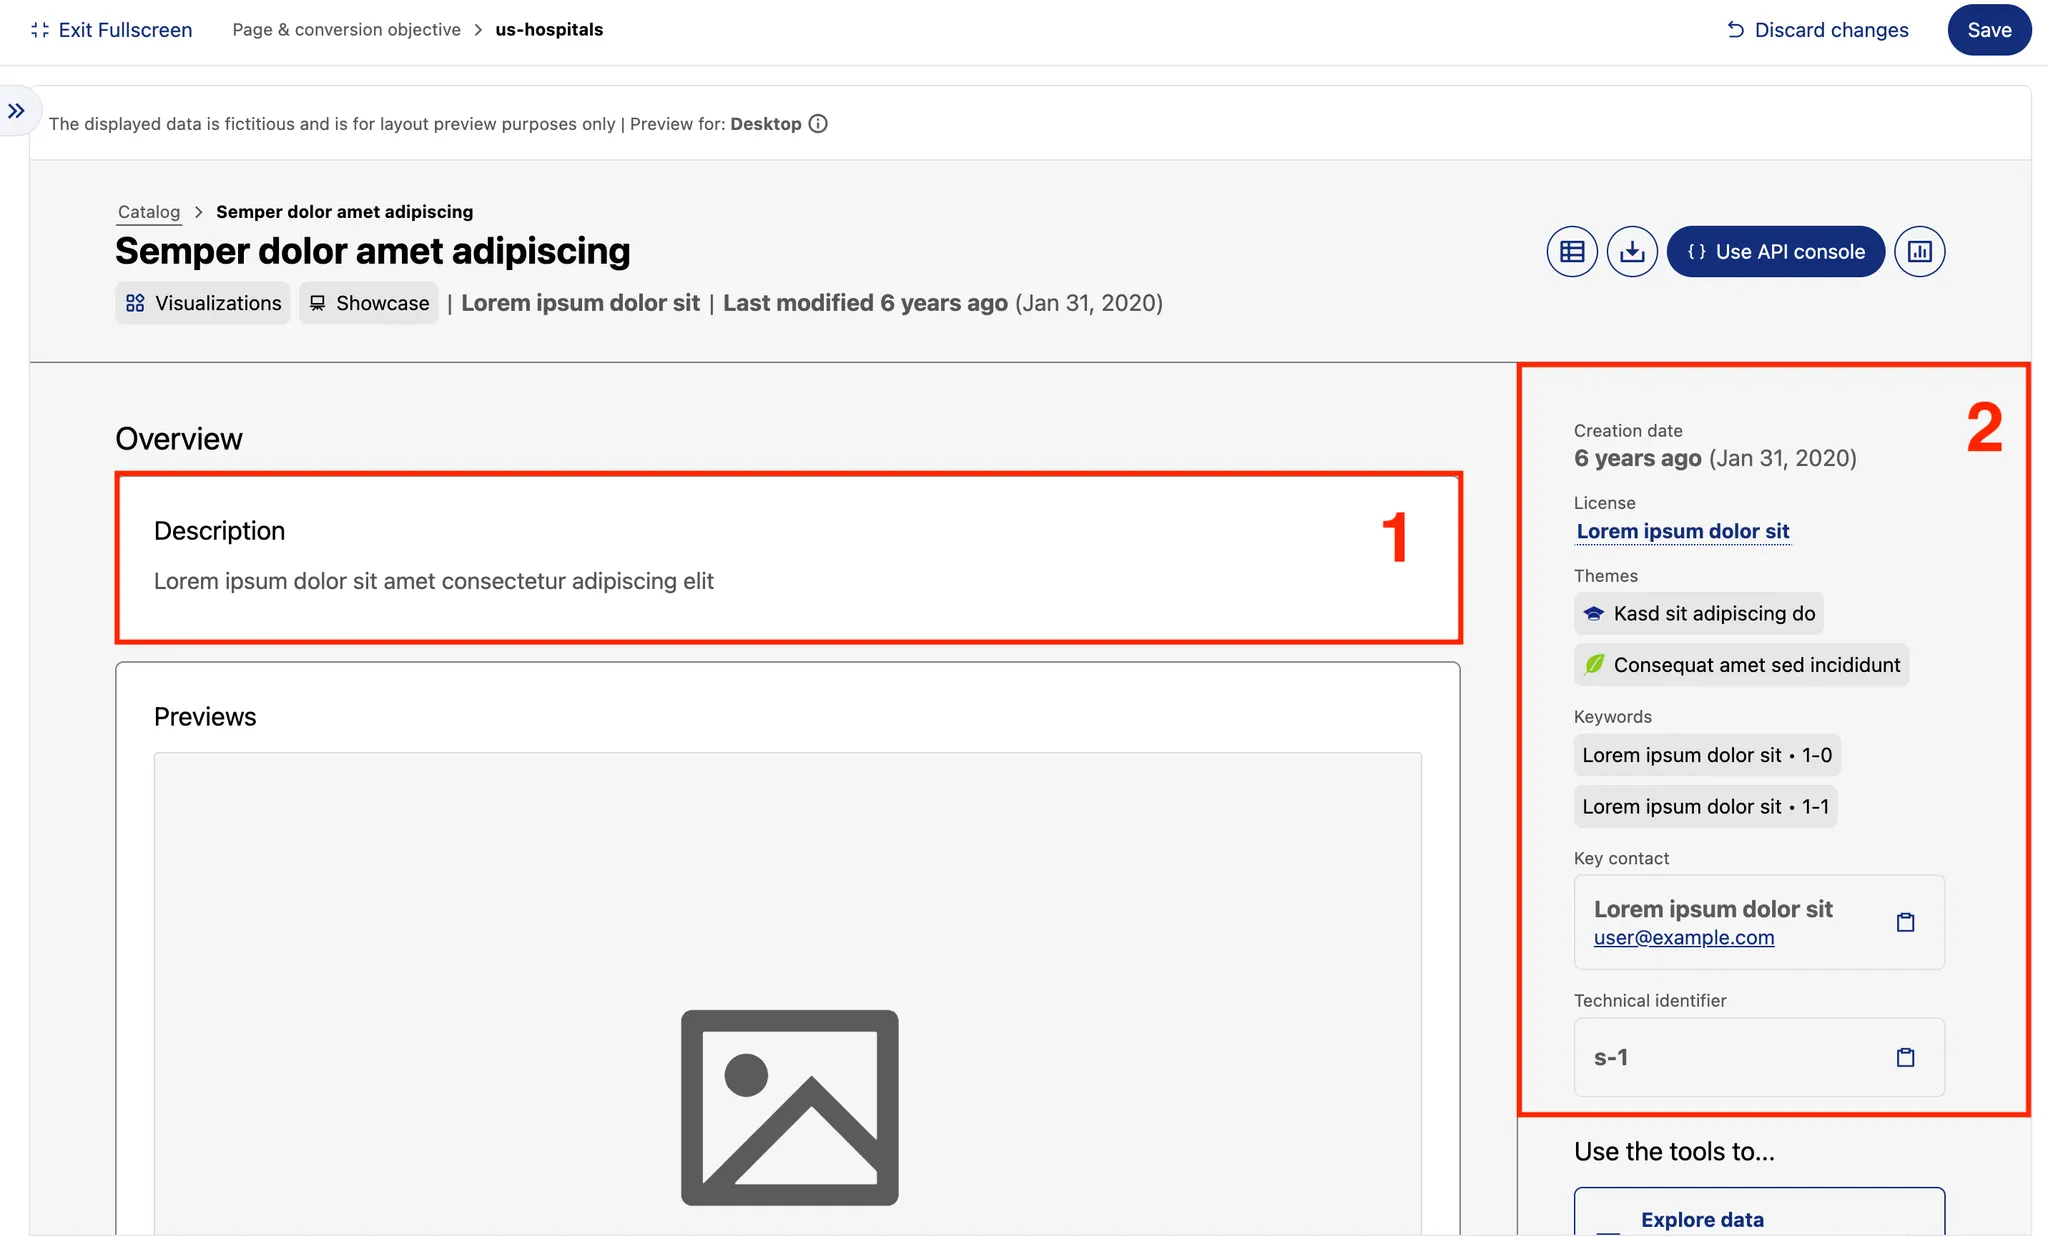
Description – shown in the main section of the asset page.
Core metadata – such as creation date, license, themes, keywords, key contact, and technical identifier. These appear in the information panel on the right (or below the main content on mobile).
You cannot remove these elements, but you can adjust their placement—either by drag-and-drop or by using the arrow controls in the editing panel.
Other elements are optional:
Complete metadata – extra descriptive fields that provide more context (see the metadata section below).
Attachments – supporting files, documents, or reports (only displayed if content is available).
Showcases – a concrete usage or enhancement of one or more datasets in the form of a map, visualization, external application, or any other data-driven project (only displayed if content is available).
Similar assets – suggestions automatically generated by AI, helping users discover related content.
Tools – a reminder of features like the API access or download options, described and displayed in the information panel.
By combining these elements thoughtfully, you can guide users toward the most relevant information and make your asset page both informative and actionable.
Show metadata
The most essential metadata is always shown in the information panel on the right. But you can also display complete metadata in the main section—and in fact, this is often a good practice, since it gives users the full context at a glance.
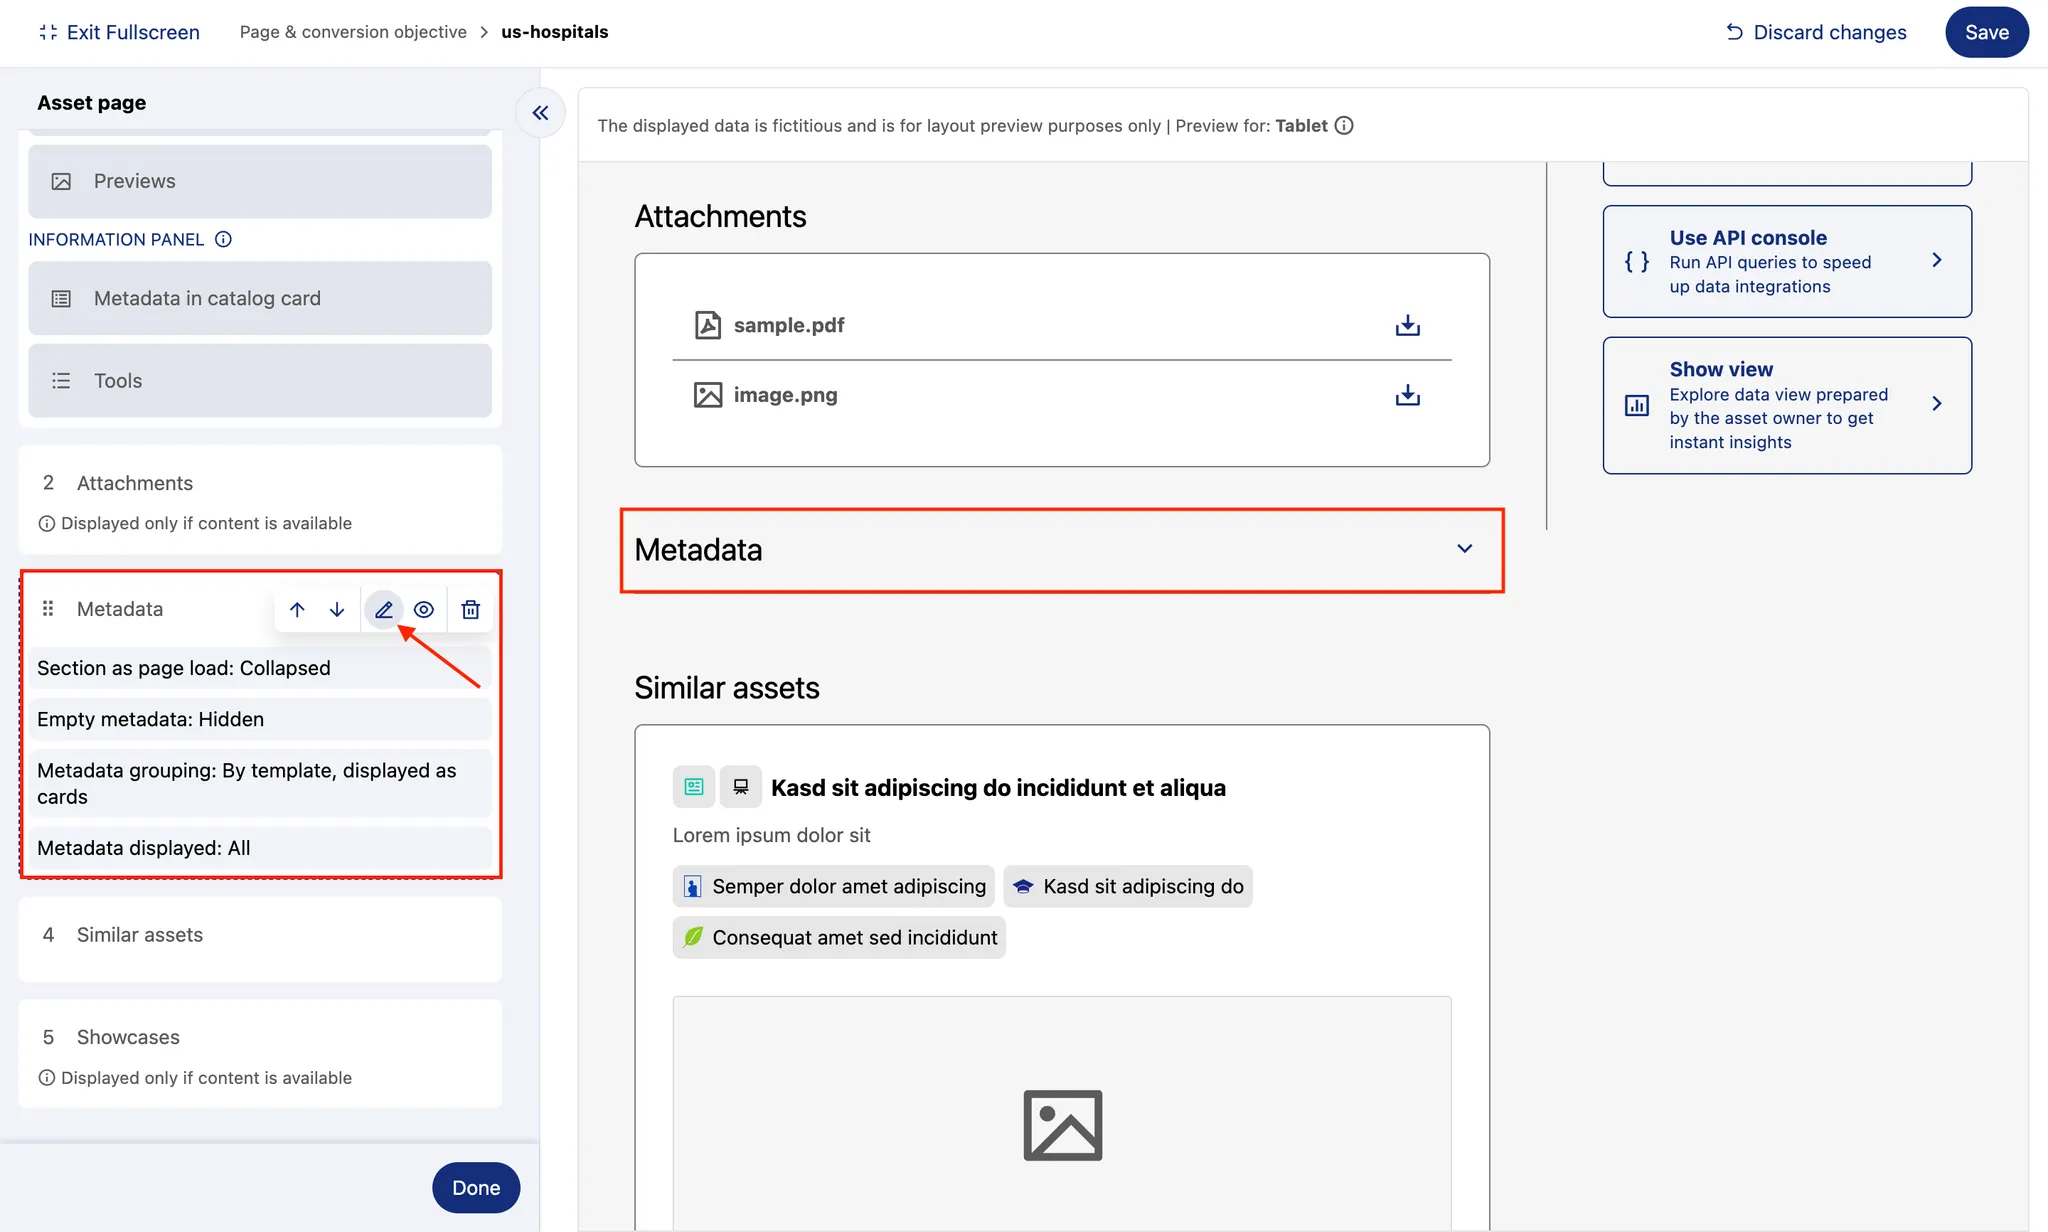
Because metadata can be customized in many ways, the editing panel has a dedicated Edit button for managing it.
1. Style
Decide how the metadata section appears on the page:
Section expanded on page load – By default, users must click the dropdown arrow to view metadata. Enable this option if you want it displayed directly.
Display empty metadata – By default, only completed fields are visible. Toggle this option to show all metadata fields, even if some are blank.
Group metadata by template – If multiple templates exist, you can choose to group fields by template or display them all together in a single alphabetical list. Grouping generally improves readability.
Layout – Available only when grouping is enabled. You can either display templates one after another (cards) or separate them into clickable tabs (tabs).
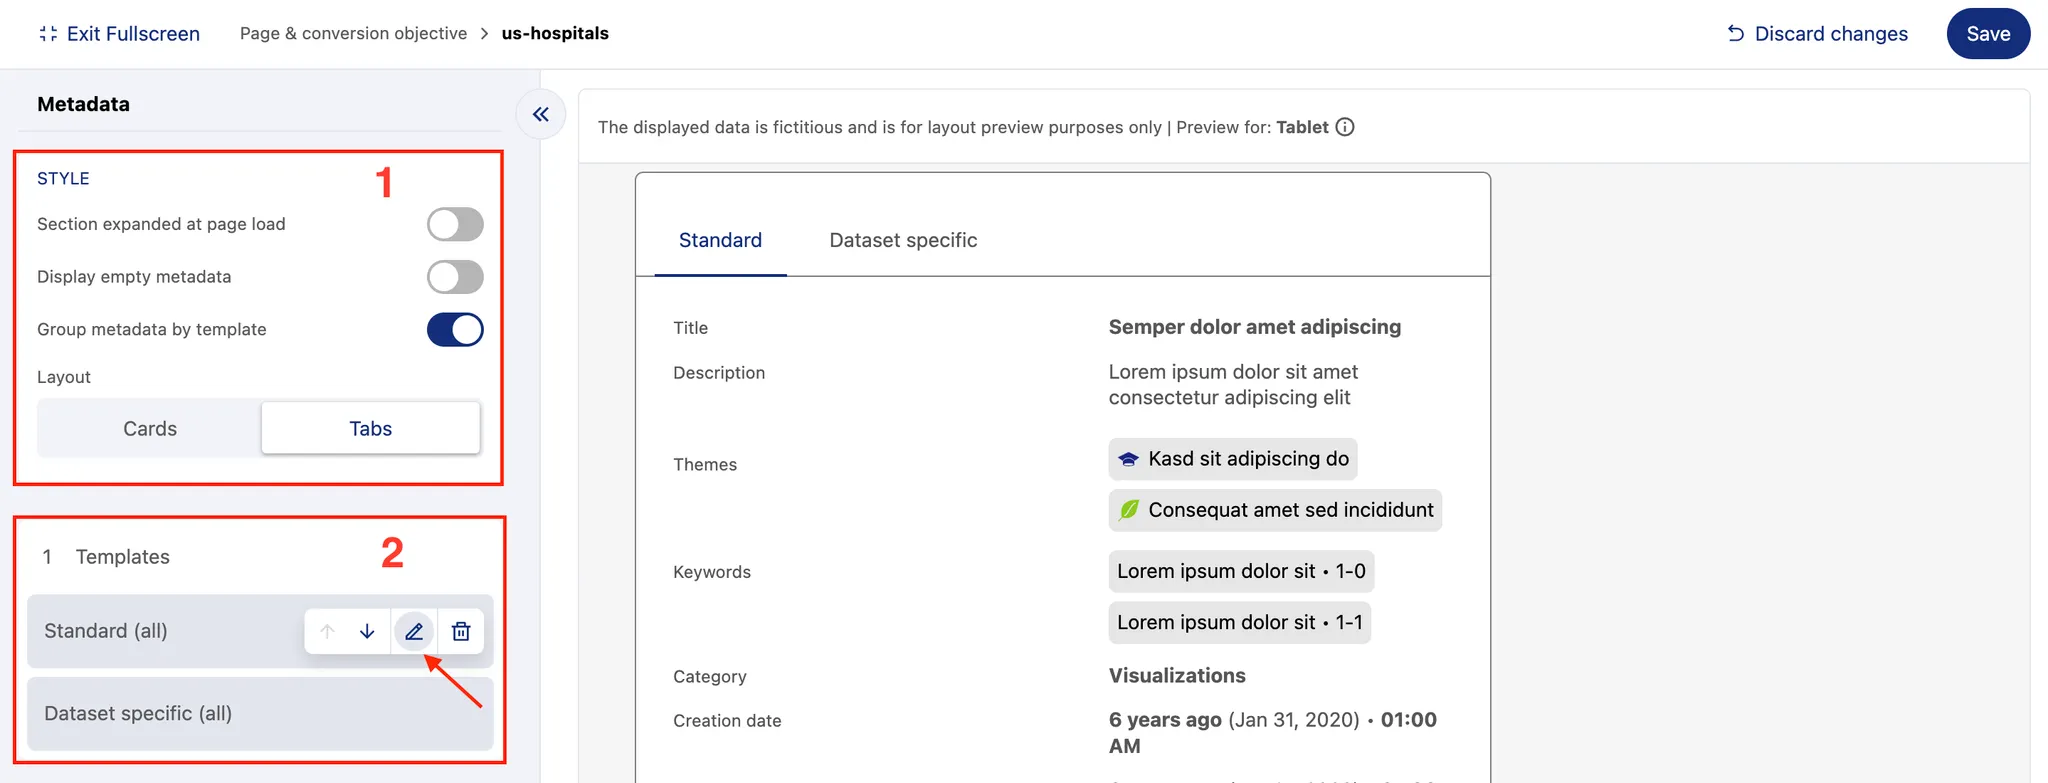
2. Templates
If more than one template exists, you can control which appear on the asset page and in what order.
Use the reorder button (visible on hover) to adjust their placement.
Clicking Delete only hides the template from the page—it does not delete it. To bring it back, use the plus button under the list and select it again.
The Edit button lets you go further, choosing which specific fields from each template to display.
Experiment with these options and check the live preview on the right to see how your choices affect the final result.
Show related assets
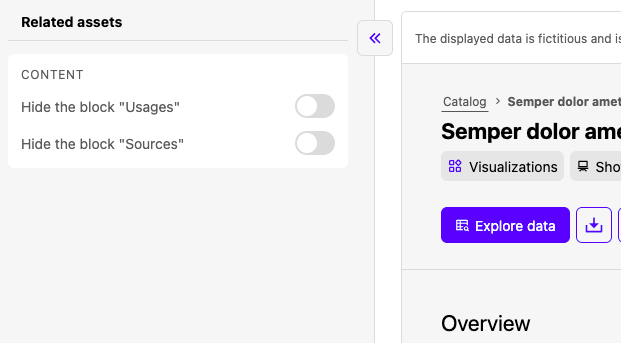
Related assets displays links between the current asset and other assets on the portal. The section includes two blocks:
Usage: Downstream assets that use the current asset (visualizations, derived showcases)
Sources: Upstream assets the current asset depends on (data source, federation, join)
Note that this section replaces the former Showcases block, which only displayed custom views linked to a dataset.
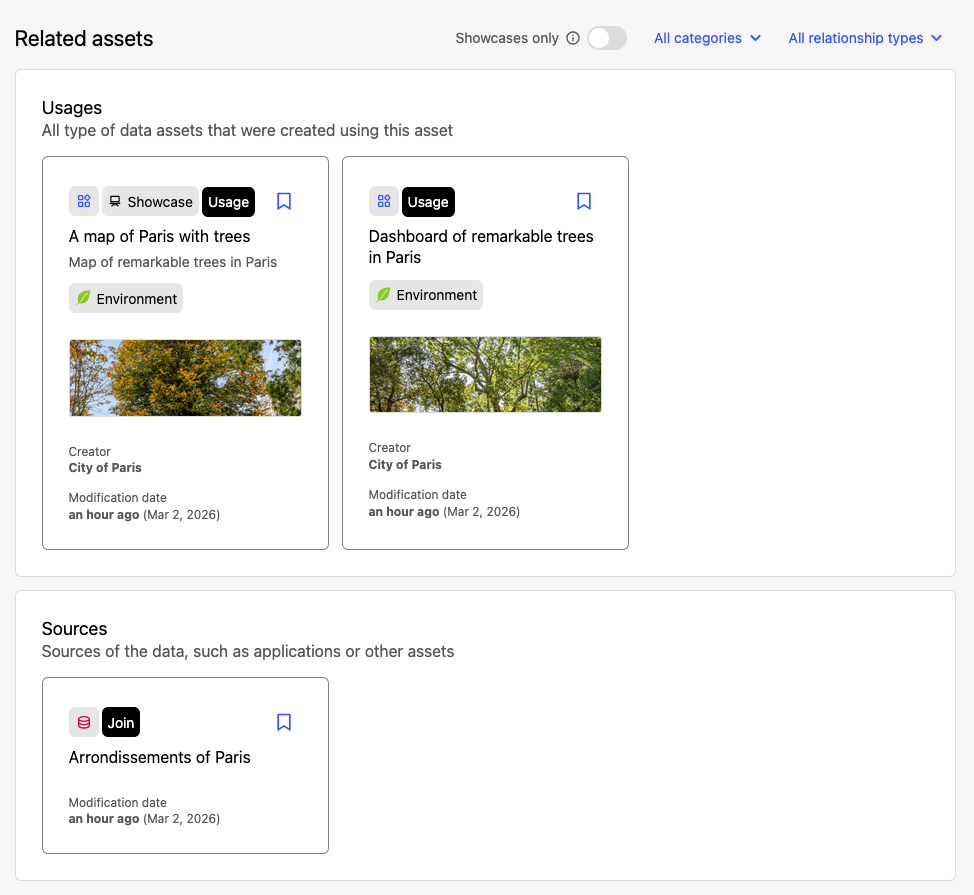
Each asset card listed shows that asset's title, category, last modification date, and relationship type (Usage, Federation, Join). Filters let users refine the display by asset type or relationship type.
As a data publisher, you can hide either Related assets block using the toggles on the section's edit panel.