
Managing users
Note that a user's experience depends on your having configured your portal to be public or private. This determines if some or all of your users must log in to your portal. If your portal is private, all users must sign in to see even your public assets. If your portal is public, you decide if users need to sign in or not.
Below is a description of how users can sign in to your portal, how to manage a user's temporary access, and how to delete a user from your workspace.
For information about how to manage a user's permissions, see here.
Two ways users can join
A user's Huwise account and the portals they are registered for are managed separately. To sign in to a portal, a user first needs a Huwise account.
Admins can invite users to join their portals. If sign up is enabled, users can join a portal on their own.
Keep in mind, then, that for any given user there are potentially two steps—the user first obtaining a Huwise account and then the user registering on your portal, as well as different states the users can be in—invited with no account, has an account but has never logged in, and finally has an account and has logged into your portal.
An admin invites a user to a portal: Admins can invite users via email. Admins are always able to manually invite users, even if the "Sign up" option is not enabled.
Users can request to join a portal: If the "Sign up" option is enabled, users are able to register on that portal. Users must use their existing Huwise account if they have one, and otherwise will be prompted to create an account.
(Users can also first obtain an Huwise account by going to https://account.huwise.com and clicking Create an account for free.)
1. An admin invites a user to a portal
Only an administrator or users with the "Edit workspace properties" permission can invite users.
You can invite one or more users to join your portal using their email addresses by going to Access > Users and clicking on Invite users. See here for more information on inviting users.
The invitation interface allows you to pre-configure that user's access. But note that once the invitation is sent, the user will appear in your list of users, and you can always go back to adjust their access later.
If the user already has a Huwise account, they will be asked to log in. If they do not, they will be prompted to create one.
Remember that you can ask users to fill out a registration form, if necessary.
2. Users can request an account on their own
To enable your users to sign up, go to Access > Log in & Sign up.
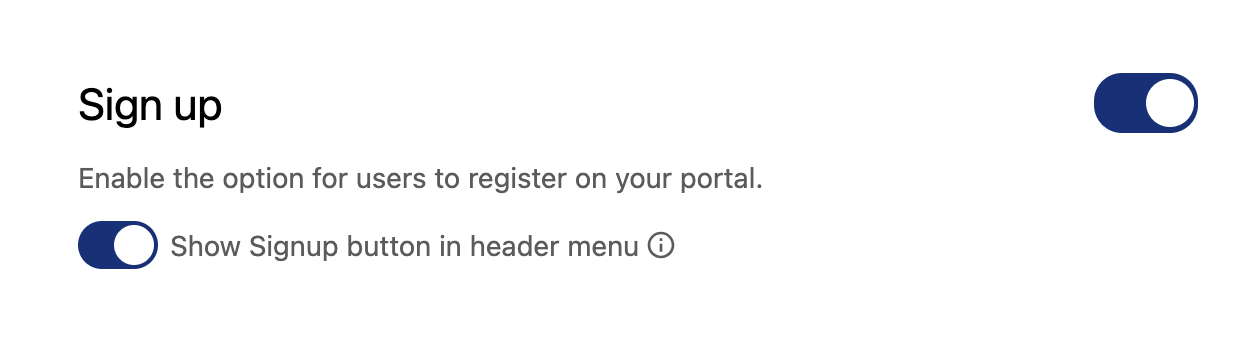
See here for more information.
Keep in mind that, on its own, logging in does not grant any additional access to data or pages. However, being identified means they are able to be given specific permissions and data quotas:
You may provide permissions to specific users or groups of users, typically to create, update, or publish datasets, but also to perform other actions you may wish them to in your portal's backend.
You may adjust users' data quotas, often in order to give specific users higher quotas than the general public.
Authenticated users can also ask to be notified when specific datasets update.
Resending an invitation
Invitations get lost. They land in spam folders, they arrive while someone is on holiday, or they simply scroll out of sight. When a user has been sitting in Pending status longer than expected, you can send the invitation again directly from the three dot menu for that user or by clicking the Resend invitation button on that user's page.
A new invitation email is sent to the same address, the access settings you configured the first time remain unchanged, and the user stays in Pending status until they accept.
Note that the action to deactivate a user is grayed out while their invitation is still pending. Deactivating an invitation that hasn't been accepted has no practical effect, so if the person should not join after all, delete the user instead.
Managing a user's temporary access
You are always able to modify the amount of time your users have access to your portal. Go to Acces > Users > the user's individual information. There you can click on Manage time-controlled access.
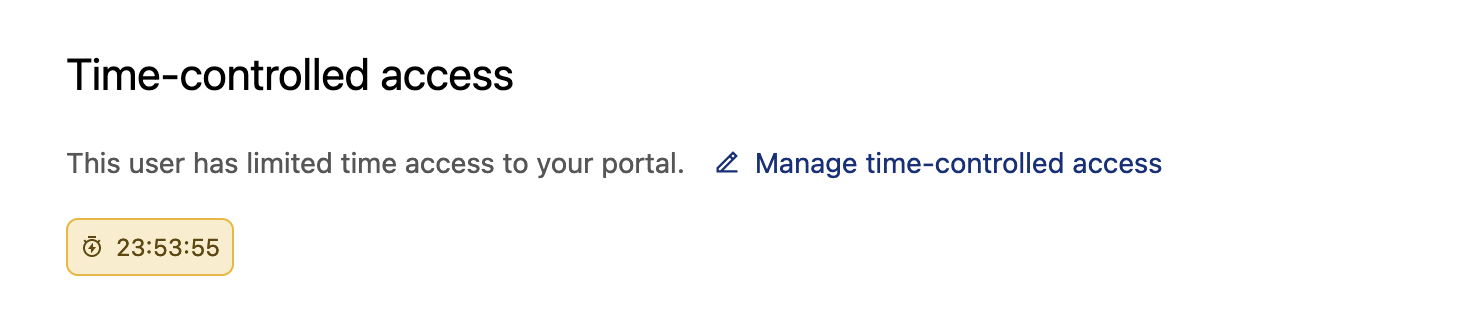
If the user has limited access, you will see a counter showing how long the user has left. In the example above, the user has access for the next 23 hours, 53 minutes, and 55 seconds.
At the end of the designated period, the user's access will be revoked and their status will be indicated as Expired. They will no longer have access to the back office, and any API keys they created will be suspended. If they need access again, you will need to edit and apply a new access period.
How to modify a user's temporary access
To revoke a user's access, to modify the amount of temporary access they have remaining, or to give the user unlimited access:
Click on Manage time-controlled access
Select the appropriate access, and click Apply
Click the Save button in the upper right-hand corner for that user's settings

Reading a user's status
The list of users shows a status badge next to each user. It tells you whether each user currently has access to your workspace and, if not, why.
The six user statuses
A user can be listed as Pending, Active, Expired, Restricted, and Inactive, as well as be deleted.
Some statuses you determine yourself, by inviting, deactivating or deleting a user. Others are determined by the platform from the dates and rules that apply to the user. For example, a user with temporary access that ends overnight will no longer have access, and they'll be indicated as Expired the next morning.
Status | What it means | Effect |
Pending | Either the user has been invited and hasn't accepted the invitation yet, or their time-controlled access is scheduled to start on a future date. | The user does not yet have access. |
Active | The user has accepted their invitation and their access is open. | The user has full access, with the permissions granted by the groups and rules that apply to them. |
Expired | The user had time-controlled access and the end date has passed. | The user no longer has access. To give them access again, edit and apply the new access period. |
Restricted | This status applies only to SSO users: The user no longer matches the conditions of a conditional access rule that applies to them. | The user currently has no access, since an active access rule is blocking them. |
Inactive | An administrator has deactivated the user. Their account and settings are kept, but access is suspended. | The user no longer has access. However, if activated again, their access begins again with all of their groups, permissions, and settings. |
Deleted | The user has been removed from your workspace. | The user has no access and no longer appears in your user list.
|
Note that two different situations share the Pending status: an invitation that wasn't accepted remains pending, and a time-controlled access scheduled to start later is also pending.
Also note that deactivating and deleting a user both remove that user's access, but they are not interchangeable! Inactive reflects that the user's access has been paused — the account and everything attached to it are kept, and one click can restore them. Deleting a user removes the user from your workspace along with what their account holds there, and cannot be undone. When in doubt, deactivate.
Why a status can change on its own
Pending (invitation), Active, Inactive and deleted arise only when someone acts: you invite, deactivate or delete a user, or the user accepts their invitation.
Expired, Pending (scheduled access) and Restricted are calculated from the dates and rules that apply to the user. Underneath, the account stays active; only the badge changes. So these three appear and disappear without any action on your side — a time-controlled access that ends overnight shows as Expired the next morning, and a Restricted user returns to Active as soon as they match the rule again.
Similarly, if you deactivate a Restricted user and reactivate them later, if they still don't meet the condition for access, they will come back as Restricted rather than Active. The restriction was never removed — it was hidden while the account was inactive.
Which status is displayed when several apply
A user can be deactivated and have an expired access period. Here is the hierarchy of statuses: Inactive > Expired > Restricted > Pending — scheduled > Pending (invitation) > Active.
The badge therefore always shows the most blocking situation, and is the one you need to act on first.
Deactivating and reactivating a user
Deactivating suspends someone's access while keeping everything else in place. Use it when access should stop but you expect it to resume — a leave of absence, an internal move, a security check — or when you'd rather not lose the person's groups and settings.
The user is listed as Inactive and can no longer log in to your workspace. Their groups, permissions and settings are preserved.
To restore access, open the user again and click Activate user. Access is restored immediately, exactly as it was before.
Note that if a conditional access rule still doesn't apply to the user, they may come back with the Restricted status rather than Active. Nothing went wrong: the restriction was simply hidden while the account was inactive.
Deleting a user
Deleting removes the user from your workspace along with what their account holds there. Once a user is deleted, it is not possible to get them back. This action cannot be canceled or reversed.
Deleting is not a way to suspend access. If access should stop only for a while, deactivate the user instead — see Deactivating and reactivating a user above. Deleting is the right action when someone has left for good, when an invitation was sent to the wrong address, or when you're cleaning up accounts you're certain won't come back.
If you used to revoke a user's access on this page, note that the behavior has changed. What revoking used to do — close access while keeping the account and its settings — is now Deactivate. Delete now really deletes, though of course this does not keep you from later reinviting the user using the same email address should you need to do so.
You can delete a user from any status — including Active. There's no requirement to deactivate them first.
Before you confirm, the interface lists what the deletion affects, so you can reassign anything that matters. Note that this summary is there to inform you of the impact, but does not in any way block you from immediately deleting the user should you still wish to do so.
If the user you delete was the only person with "Manage connection" rights on a saved connection, you become that connection's manager, as long as datasets use it or other users or groups share it. If the connection isn't used or shared, it's deleted along with the user. Deactivating a user doesn't do this: their connection rights stay with the inactive account. See Saving and sharing connections for more information.
User requests for deletion
If a user asks to be deleted, you can delete them only from your workspace.
To be deleted not only from your workspace but to have their entire Huwise account permanently deleted, a user must send a request to our support (support@huwise.com).