
Configuring your catalog page
The catalog is like a storefront: it's worth making it helpful and inviting. Spending some time configuring your catalog can help your users more quickly understand and explore your assets.
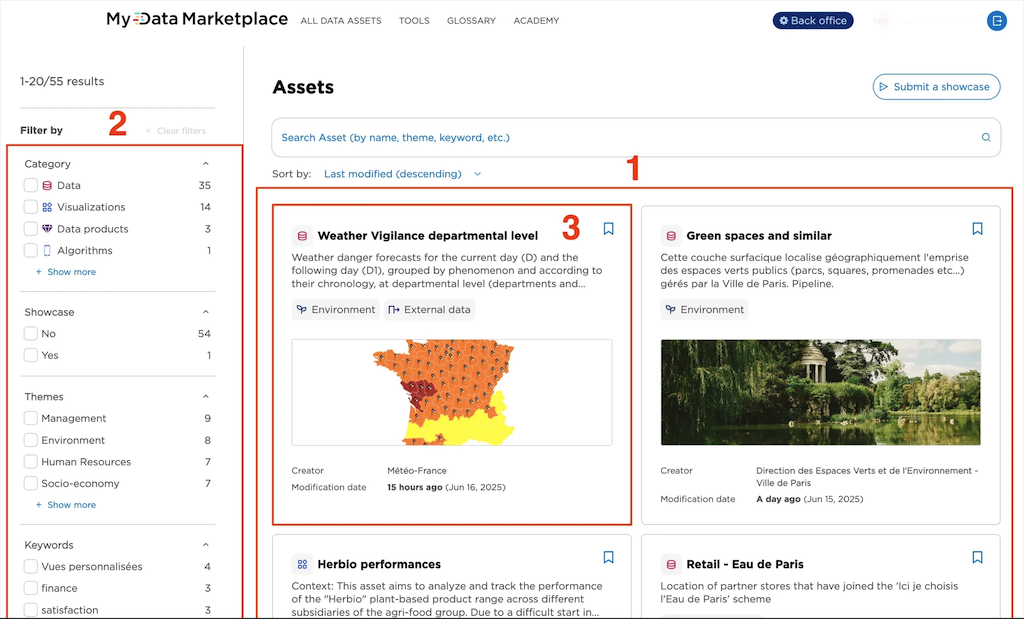
There are three key ways to personalize your catalog page (see the numbers in the image above):
Sorting the cards
Customizing filters
Choosing the metadata shown on each card
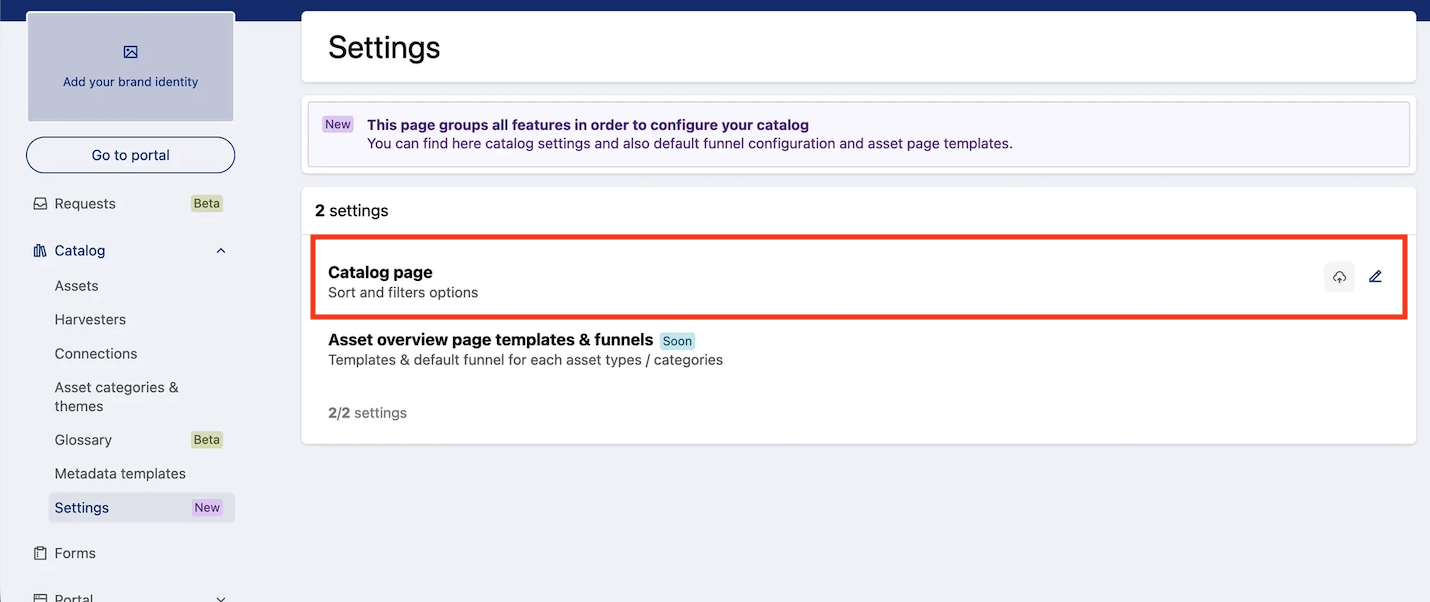
In your back office, you'll find these customization options under Catalog > Settings > Catalog page.
1. Sorting the cards
You can define the default order of your cards, for example newest card first, in alphabetical order, or really whatever fits your catalog best. This is the order that will display before the user performs any search.
Note that this setting won't apply if users perform a semantic search — results are then ranked by relevance instead.
Exceptions are searches for the title or description, or that use keywords, where your default sort order still applies.
2. Customizing filters
Filters appear on the left of the page and can be used alongside semantic search. You can select which filters to show (simply delete those you don't want), reorder them, choose if each one is single- or multi-select, and set how its values are sorted (by count, name, or value).
Only certain metadata fields can be used as filters. Once added, keep in mind that boolean filters are always single-select, and date filters don't currently have further settings to adjust.
3. Choosing the metadata shown on each card
Catalog cards should give a quick, clear snapshot of each asset. You can customize what they show and how they look.
Here's what's possible:
Edit "Catalog cards" then edit "Content." Select the metadata you want to highlight. You can choose up to 8 fields from a curated list of asset and dataset metadata (creator, keywords, license, and more).
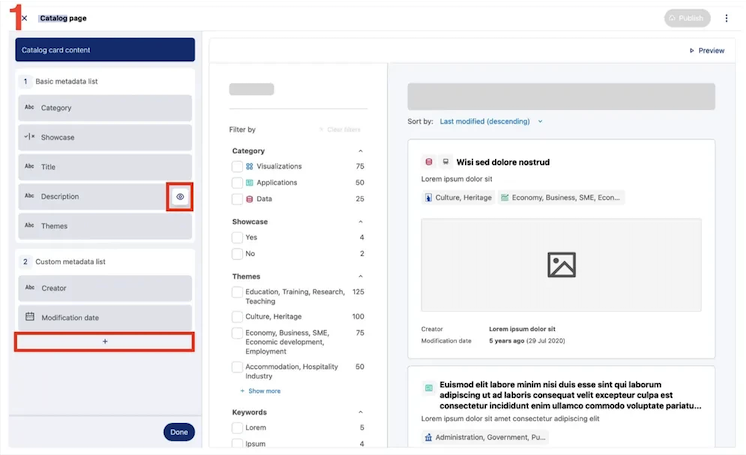
Show or hide basic metadata using the eye icon
Select and sort custom metadata (simply click the "+" button to add more elements from the custom metadata list)
Show or hide the conversion objective button. This only controls whether the button appears; the objective itself is set on each asset, not here. See Configure your asset page to choose it.
Edit "Catalog cards" then "Style." Choose the card size and toggle the thumbnail display.
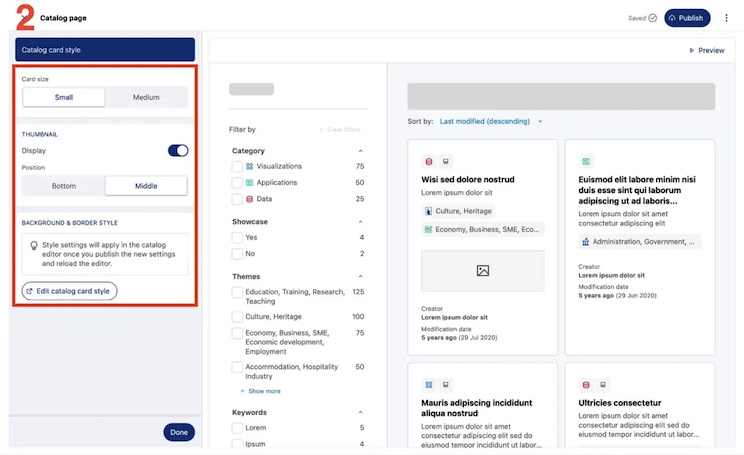
Select small or medium card and thumbnail sizes
Toggle thumbnail images off or on and choose their position
Click on the Edit catalog card style button or go to Portal > Style. Then scroll to "Catalog cards." There you can also adjust the card colors and borders. For more information see this User Guide article, or this post in our Community.
Reviewing and publishing the results
A live preview on the right lets you see changes as you go.
Once you're happy with the setup, click on Publish to update your page.
If you want to start over, Discard changes reverts everything back to your last published version.