
Configuring a dataset's filters
Every dataset can be configured to include filters to allow your users to find the data they need. These can easily be configured to include only the most relevant fields, and in the order you think will be the most useful.
The filters are visible on the left when exploring a dataset, as well as what in the Chart Builder and Analyze views.
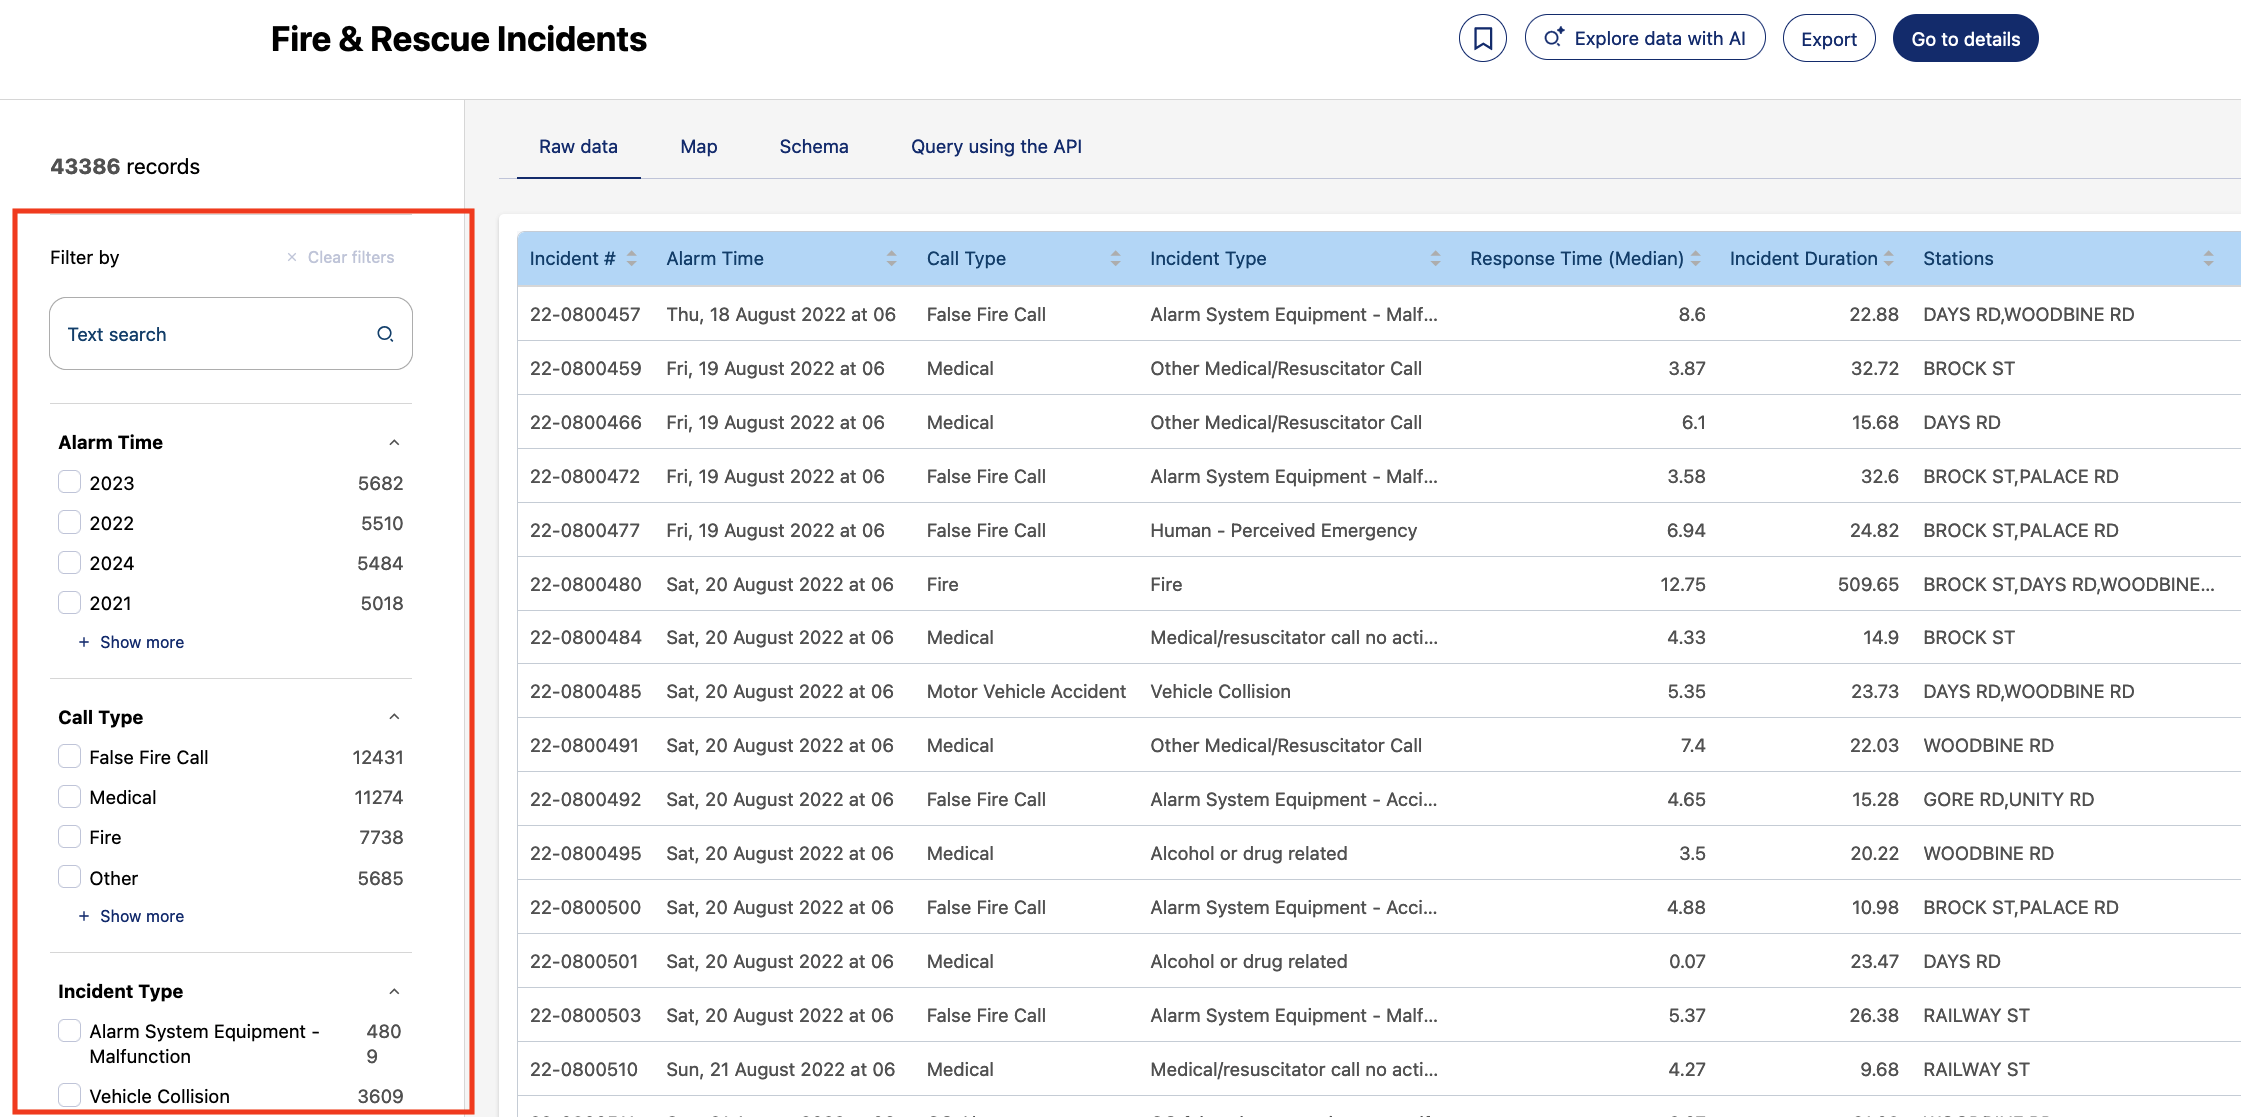
Setting up a dataset's filters
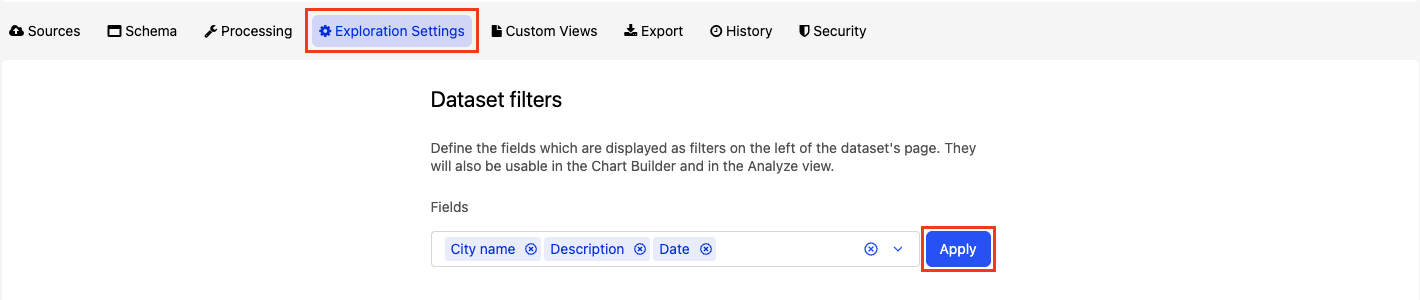
In your back office go to your dataset. Click on the Exploration Settings tab.
There you can choose which fields you want to use as filters. Choose as many as you like from the list of fields, then click the Apply button.
Once you have applied your choice, you will see those fields listed underneath.
There you can reorder them using the arrows or the grip icon on the left of each field. This determines the order the filters will appear on the left when a user navigates your dataset. You can also delete them from your selection with the small x icon.
Click on the edit icon to edit the filter and specify the sorting order, and if you want to allow users to select multiple values at once.
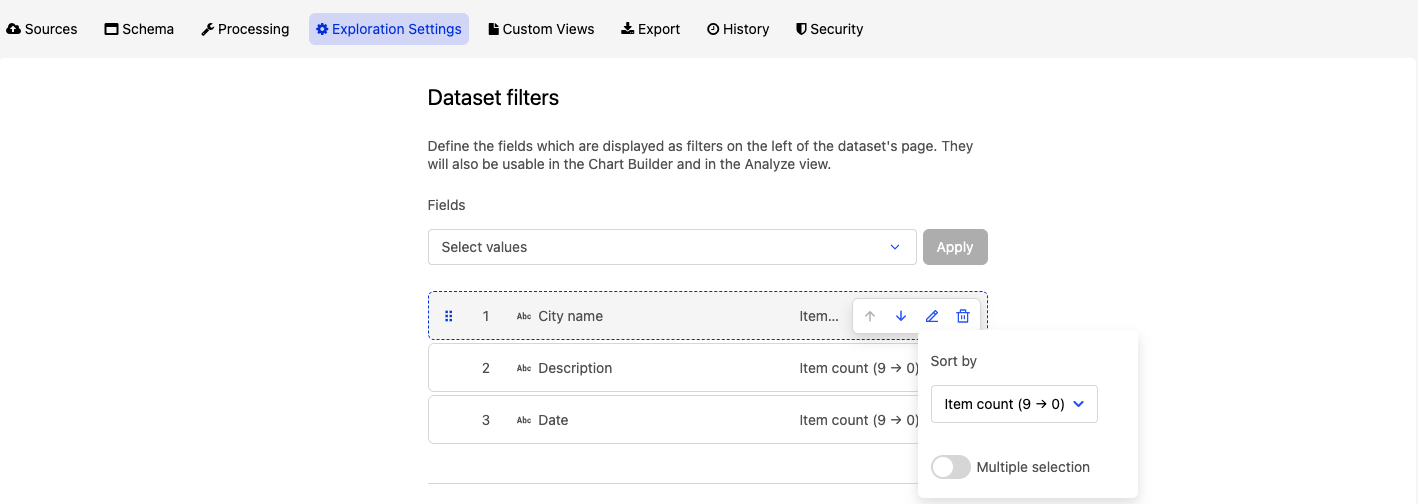
There are four possible sorting methods:
Item count (largest first): entries are ordered from the one with the most records to the one with the fewest
Item count (smallest first): entries are ordered from the one with the most fewest records to the one with the most
Name (Z to A): entries are ordered in reverse-alphabetical order
Name (A to Z): entries are ordered in alphabetical order