
Managing access to your assets
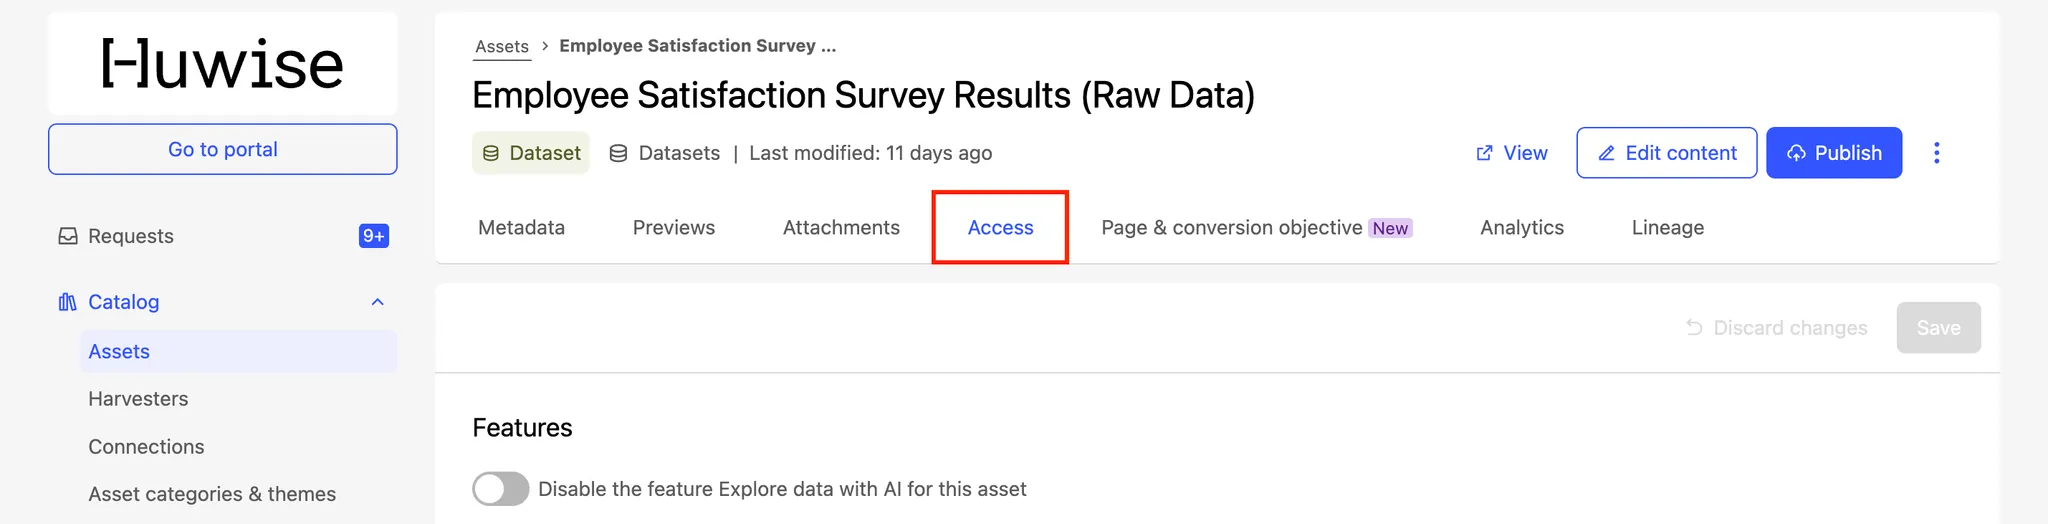
Once you’ve created your asset, you can define who can find it and who can access its content. In your back office, in the asset you wish to modify—in what we call the Asset manager view—select the Access tab.
You can choose whether to make the asset visible or hidden in the catalog, set it as public or restricted to certain users or groups, and allow users to request access when they don’t have it.
Visibility and access
Visibility defines whether users can find an asset in the catalog and see its metadata. Access defines whether they can open and view the asset’s content.
An example scenario: an asset can be visible—so anyone can discover it and view its metadata—but accessible only to a specific group of users. Those without access can still request access. Details on how this works below!
Visibility
By default, the toggle “Exclude asset from catalog search results” is off, so the asset appears in search results and its metadata is visible to all users. This doesn’t grant everyone access to the content itself, but it lets them find the asset and know it exists. It’s generally best to keep important assets visible. If you enable access requests, users without permission can easily ask for access—making the process smoother and more transparent.
However, in some cases you may want to hide an asset from search results—for example, internal or “governance” assets used to manage the portal, such as monitoring datasets. To do this, simply turn on “Exclude asset from catalog search results.” Doing so also excludes those assets from appearing among any asset's "Related assets."
Features (AI)
The Access tab also includes a "Features" section that lets you control whether this asset is available in the marketplace's AI features.

Enable the "Exclude asset in AI features" toggle to remove the asset from all AI features in the marketplace.
When this option is enabled:
The Huwy floating bubble is hidden on the asset page and all its consumption tools (Explore, exports, etc.), and for all users.
The asset is no longer accessible via the MCP server: It does not appear in Huwy's search results, cannot be retrieved by its ID or name, and its records are inaccessible to the agent.
Huwy behaves as if the asset does not exist — naturally, no error message reveals its existence to the user.
This setting overrides all visibility rules defined at the domain level. An excluded asset is invisible to Huwy regardless of the agent visibility mode configured on your portal.
Combining both toggles
The two toggles — catalog exclusion and AI features exclusion — can be enabled independently or together.
Configuration | Catalog search | Accessible by Huwy / MCP |
|---|---|---|
No toggle enabled | Asset is visible | Yes |
Exclude from catalog only | Asset is hidden | Yes |
Exclude from AI features only | Asset is visible | No |
Both toggles enabled | Asset is hidden | No |
Access
If the toggle “Restrict access to authorized users and groups” is off, all members of your organization can access the asset’s content. If your portal is public (for example, in an open data context), then anyone visiting the portal will also have access to it.
To limit access, turn on “Restrict access to authorized users and groups.” You can then assign permissions in the Users and Groups sections.
Access requests
This option may be unavailable if your portal admin hasn’t enabled access requests at the portal level. Contact your admin to activate the feature.
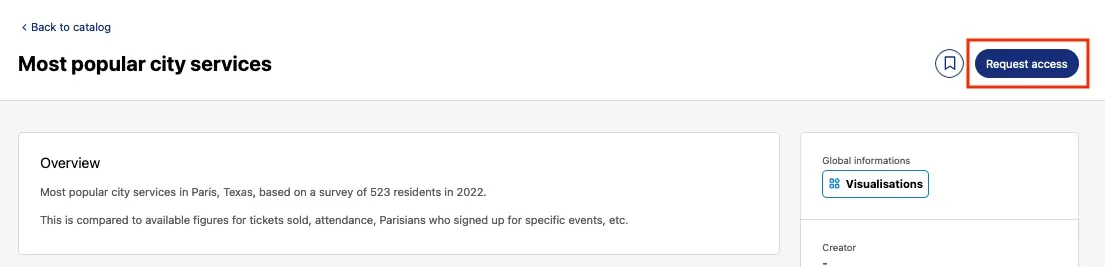
The Access requests feature lets users without permission ask for access to an asset. They can still find the asset in catalog searches and open its asset page, but instead of seeing the usual consumption tools, they’ll see a Request access button in the top-right corner.
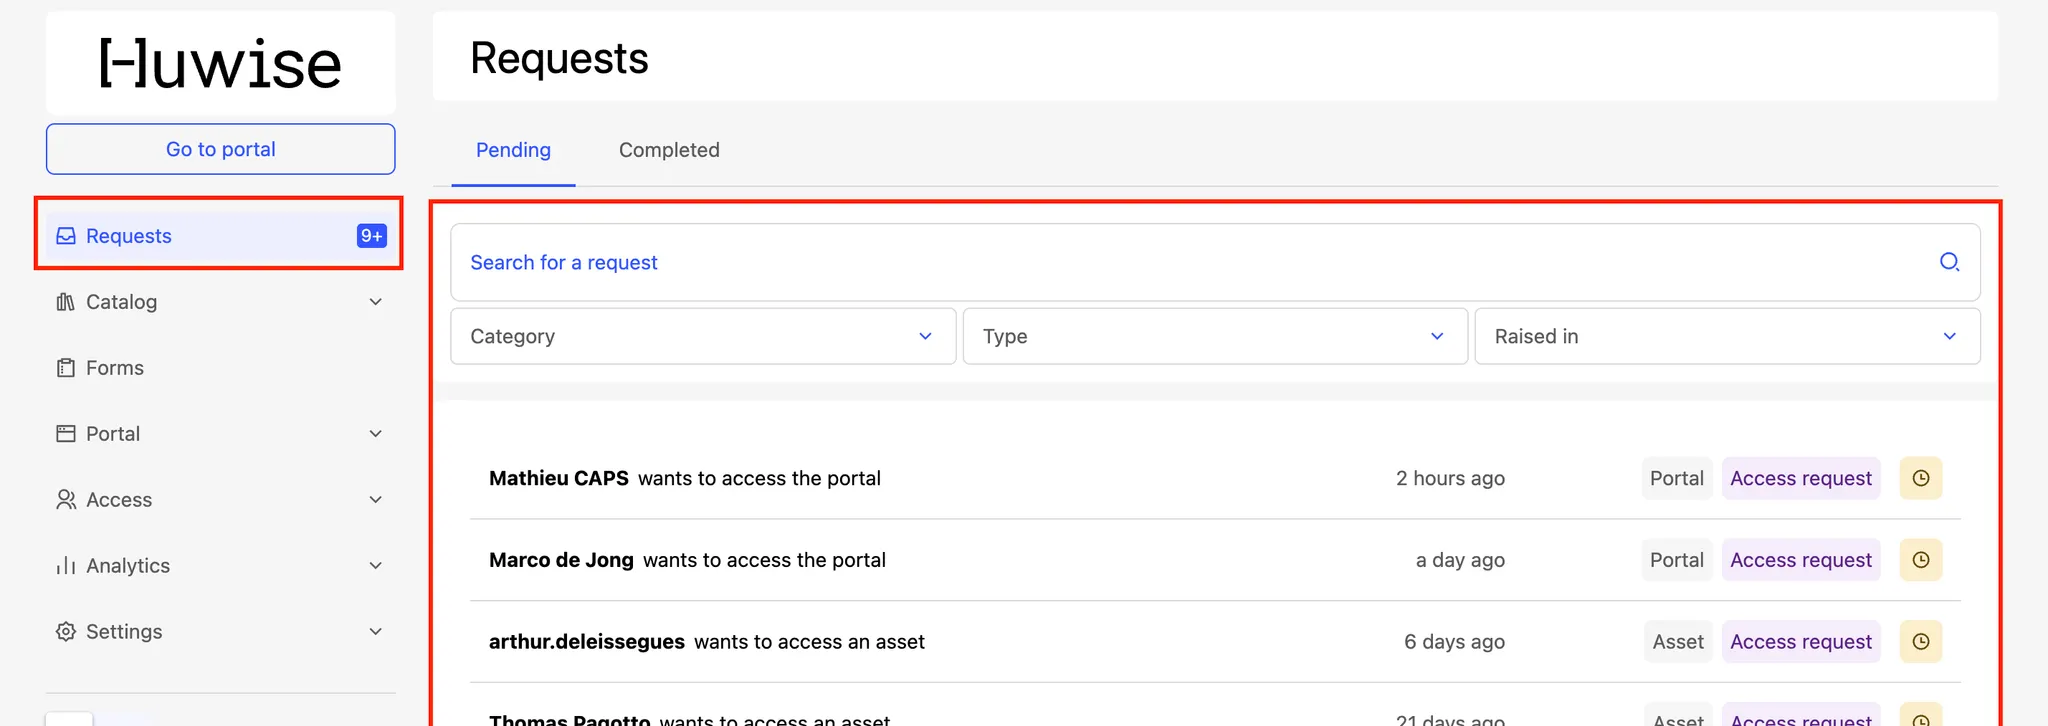
You’ll receive their request in the "Requests box," where you can approve or reject it. No need to manage access in advance—keep assets restricted by default, and let users come to you when they need access. In short: self-service.
By default, the access requests feature is enabled. To disable it, toggle “Disable access requests.” Note that if the access feature is turned off, the asset will only be visible to users with access, even if its visibility setting is enabled.
Manage access requests
To approve or deny a request, go to the Requests page. In the Pending tab, select the request you want to review. You’ll see the asset concerned, the user requesting access (you can click either for details), and the message they included. Click either Reject or Manage access.
Once you have clicked Manage access, you can specify if the user has the permission to edit the asset, publish it, or edit its metadata, depending on what kind of asset it is. Note that if the asset is external to Huwise, you must provide any editing rights directly from the platform on which that asset is hosted.
To update or revoke access later, go back to the asset’s access settings in the Asset manager. All users with access appear under the Users section. Read on for details.
Users, permissions, and groups
You can give access to specific users or groups. To do so, turn on “Restrict access to authorized users and groups” in the Access section. Then, add users individually in the Users section, or select a predefined group in the Groups section (groups are set up by your portal admin).
Next to each user or group, choose a permission level:
View allows users to explore, export, or use any other consumption tool. This is the default and most common permission.
View and edit adds editing rights. Use this when you want to let someone else modify your asset.
View, edit, and publish includes publishing rights after modification. Grant with care: this level gives full control over your asset, including the ability to delete or unpublish it.
All users and groups with access appear in their respective sections. To remove one, hover over their name and click Delete. To change permissions, use the permissions dropdown.
The Security tab
Some settings remain on the Security tab, visible when you explore a dataset.
These settings allow you to set API call limits on users and groups (configured on the Access tab), as well as to filter which fields are visible users.