
Setting up Single Sign-On (SSO) on your portal
The SSO feature is enabled on Advanced and Ultimate plans, and is otherwise available as an add-on.
Single Sign-On (SSO) allows your users to log into Huwise using the credentials they already use daily: their corporate directory, a government identity service, or any other external identity provider (such as Azure AD, Google Workspace, Okta, or Auth0). Instead of creating and managing separate Huwise accounts, your users authenticate once through a trusted provider and are automatically recognized in your workspace.
Why use SSO?
Without SSO, every user needs a dedicated Huwise account with its own password. For organizations with dozens or hundreds of users, that means more passwords to manage, more onboarding overhead, and a weaker security posture.
With SSO, you delegate authentication to a provider your organization already trusts. Users get a familiar login experience, your IT team keeps centralized control over who can access what, and you reduce the risk of forgotten or compromised credentials.
SSO also opens the door to conditional access rules, a fine-grained policies that evaluate identity attributes (like department, or organisation membership) to decide whether a user is allowed in, denied, or placed in a pending approval queue. This gives you precise control over who reaches your workspace and under what conditions.
Supported protocols
Huwise supports four types of identity providers. Each one uses a different authentication protocol, and the right choice depends on what your identity provider supports.
Protocol | Description | Providers per workspace |
OpenID Connect (OIDC) | an authentication layer built on top of OAuth 2.0. It's the most widely adopted modern standard. If your identity provider offers both OIDC and SAML, OIDC is generally the recommended choice — it's easier to set up and supports features like automatic discovery of provider endpoints. | Multiple OIDC providers can be enabled at the same time |
SAML 2.0 | Security Assertion Markup Language is an XML-based protocol that has been the enterprise standard for over a decade. Many older or on-premises identity providers support SAML exclusively. Note that only one SAML provider can be active on a workspace at any given time. | Only one SAML provider can be enabled at a time |
ProConnect | French government agencies using the national ProConnect (formerly AgentConnect) service | Only one ProConnect provider can be enabled at a time |
ProSanteConnect | French healthcare organizations using the ProSanteConnect identity service | Only one ProConnect provider can be enabled at a time |
How the login flow works
When SSO is configured, the login experience changes for your users. Here's what happens behind the scenes when someone logs in through an SSO provider:
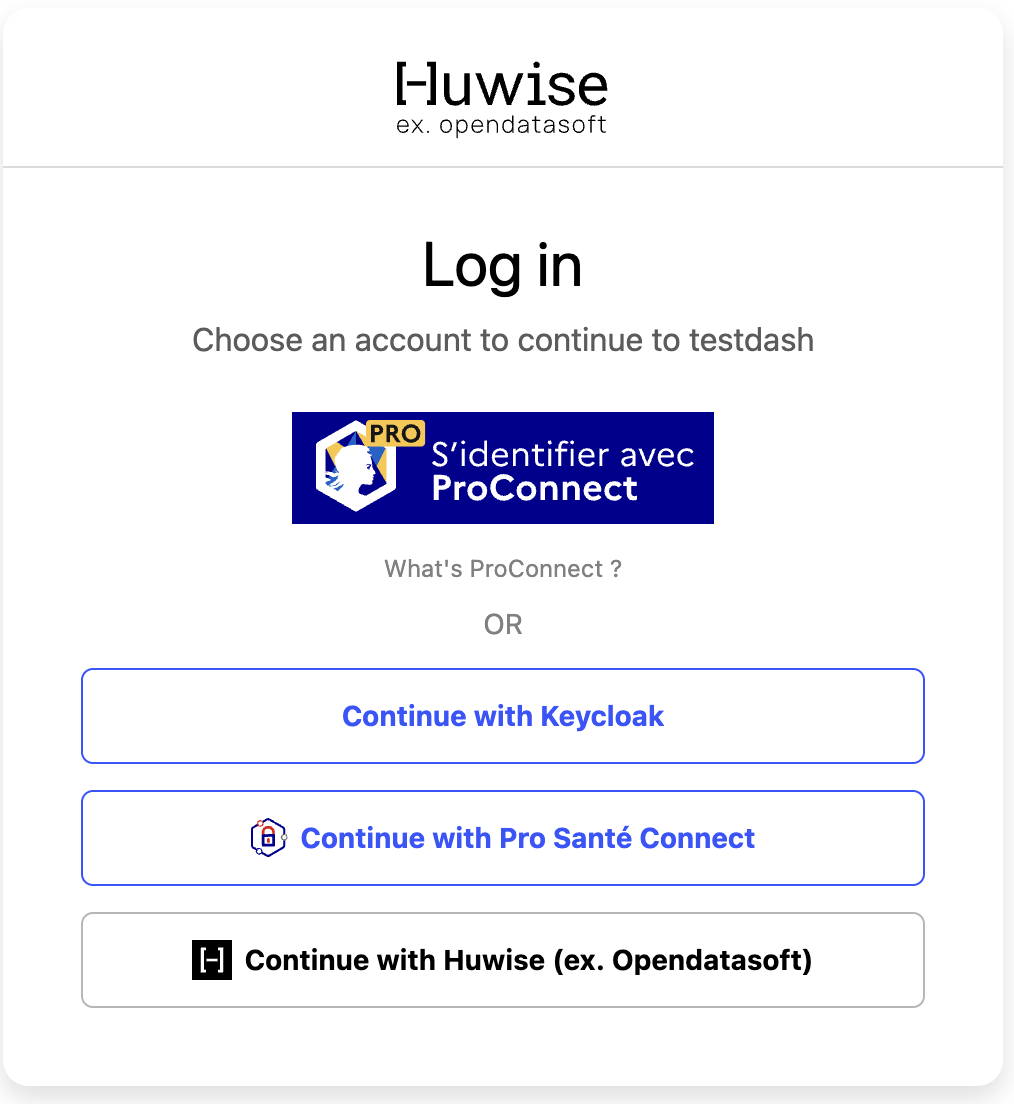
1. The user visits your Huwise workspace login page and clicks the SSO login button for their provider.
2. The user's browser is redirected to the external identity provider (for example, Azure AD or your SAML server).
3. The user authenticates with the identity provider using their usual credentials (corporate password, multi-factor authentication, smart card, etc.).
4. After successful authentication, the identity provider sends the user back to Huwise along with a set of identity claims — attributes like email address, first name, last name, and group memberships.
5. Huwise matches these claims to an existing user account, or creates a new account if this is the user's first login.
6. If you've configured conditional access rules, Huwise evaluates them against the user's claims. Depending on the result, the user is either granted access, denied access, or placed in a "pending approval" state until a portal administrator approves the request.
7. The user lands on your workspace, fully authenticated.
The entire flow typically takes just a few seconds. From the user's perspective, they click a button, log in with their existing credentials, and arrive on the platform.
What you can configure
Each identity provider you add to your workspace comes with a set of configuration options. While the details vary by protocol, here are the main areas you can customize:
Connection settings: the technical details that connect Huwise to your identity provider. For OIDC, this includes a client ID, client secret, and a discovery endpoint URL. For SAML, you provide the provider's metadata XML document.
Claim mappings: which identity attributes from your provider map to the user's first name, last name, and email address in Huwise. For example, you can tell Huwise that the
given_nameclaim contains the first name and thefamily_nameclaim contains the last name.Group mappings: rules that automatically assign users to Huwise user groups based on their identity attributes. For instance, you can map everyone with a
roleattribute ofanalystto your "Data Analysts" group.Conditional access rules: policies that evaluate the user's identity claims at login time and decide whether to approve, deny, or require manual approval. You can reference access lists (curated lists of allowed values) in these rules for powerful, list-based filtering.
Login button appearance: a custom icon and label for the SSO button on the login page, so users can easily identify which provider to use.
Advanced settings: protocol-specific options like JWT bearer token authentication, single logout (SLO), and authentication context requirements.
Prerequisites
Before you can add an identity provider to your workspace, make sure the following conditions are met:
Portal administrator access — You need the portal administrator role (specifically, the "edit domain" permission) to create, edit, or delete identity providers.
Identity provider credentials — You'll need technical details from your identity provider's administrator: client credentials for OIDC, or a metadata XML document for SAML.
Configuring an IdP
You manage identity providers from Access menu. Navigate to the authentication or SSO section to see the list of all configured providers, their type, and their current status (enabled or disabled).
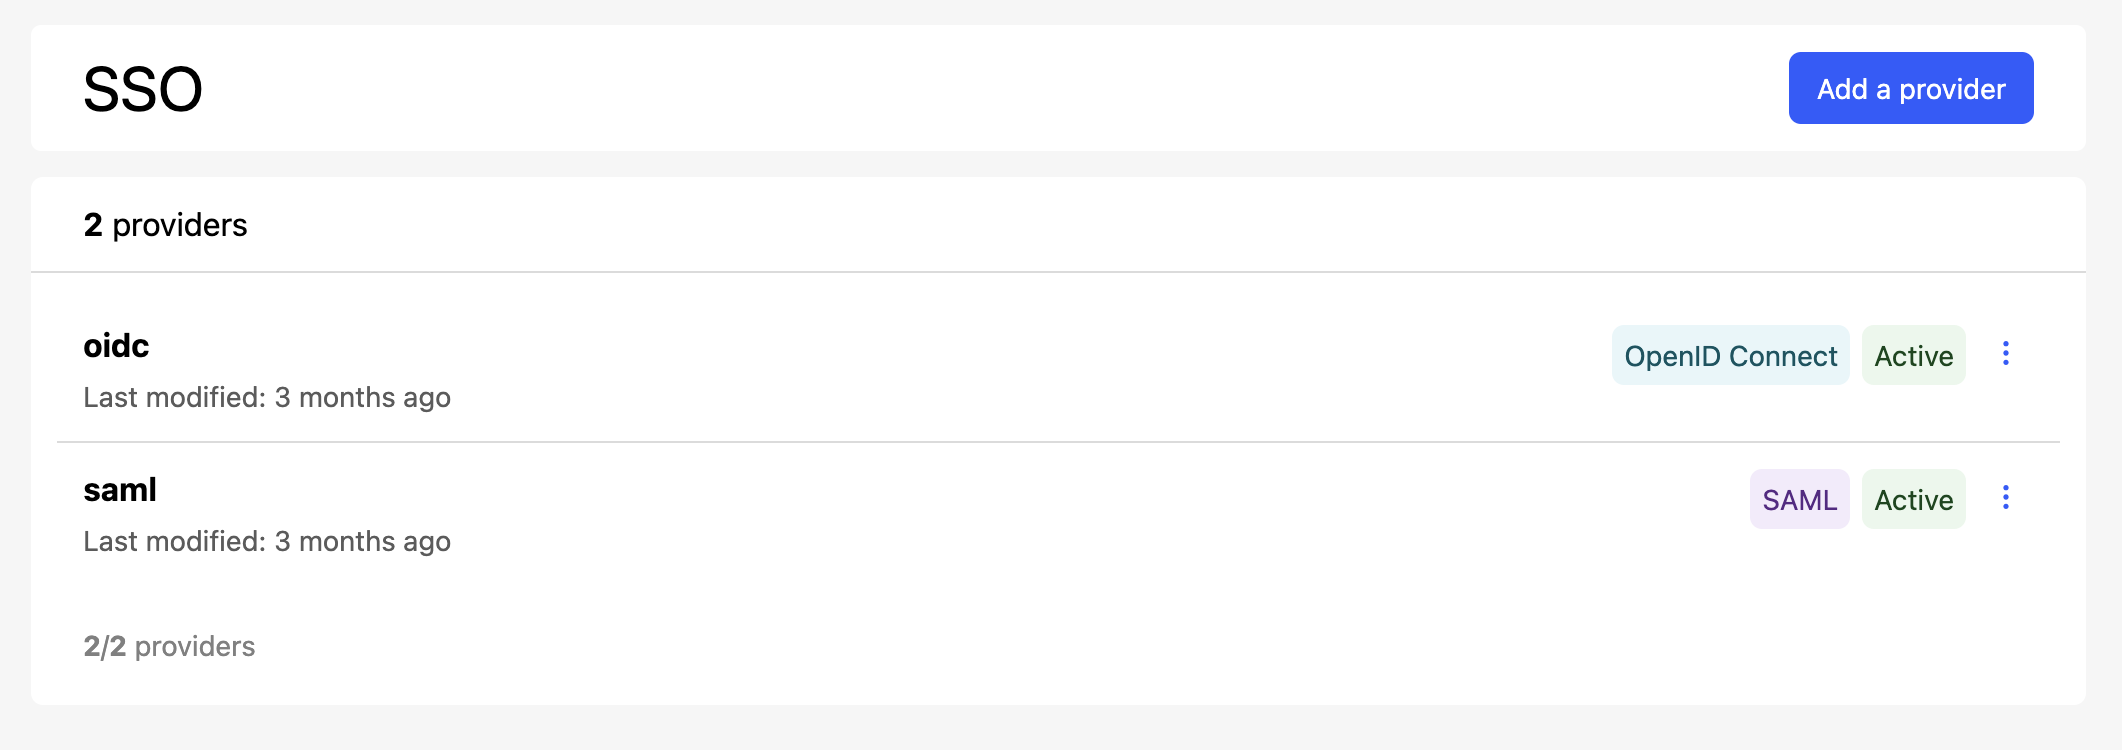
To set up a new identity, click on Add a provider. A wizard will open up to guide you through the process.
For each existing configuration, click on the three dot icon on the far right to edit a configuration, activate or deactivate it, or delete it.
Getting started
Now that you understand how SSO identity providers work, you're ready to set one up. Choose the article that matches the protocol your identity provider supports: