
Managing access requests
When you ask people to register before they can use your portal, each sign-up becomes an access request waiting for your decision. This article is for domain administrators who manage who gets into the portal. It explains where to find pending requests, how to approve someone (and choose what they can do), and how to turn a request down.
You need the Edit domain properties permission to review access requests. If you don't see the menu described below, ask a domain administrator to grant you that permission.
This article covers requests to access your portal. Requests to access a specific data asset are handled separately — see Managing access to your assets.
What a portal access request is
A portal access request is created whenever someone registers on your portal and you've chosen to approve each sign-up manually. Instead of the person getting in automatically, their request lands in your back office, where you decide whether to let them in and what they're allowed to do.
Access requests only appear if your portal allows people to register but requires your approval. If registration is switched off entirely, there are no requests to review — see Inviting users to your portal to set up how people join.
Depending on your experience, access requests appear in one of two places: a Requests inbox (the data marketplace experience) or a dedicated Access requests page (the legacy experience).
Reviewing requests in the Requests inbox
The Requests inbox gathers every kind of request you might need to handle in one place — including people asking to access the portal.
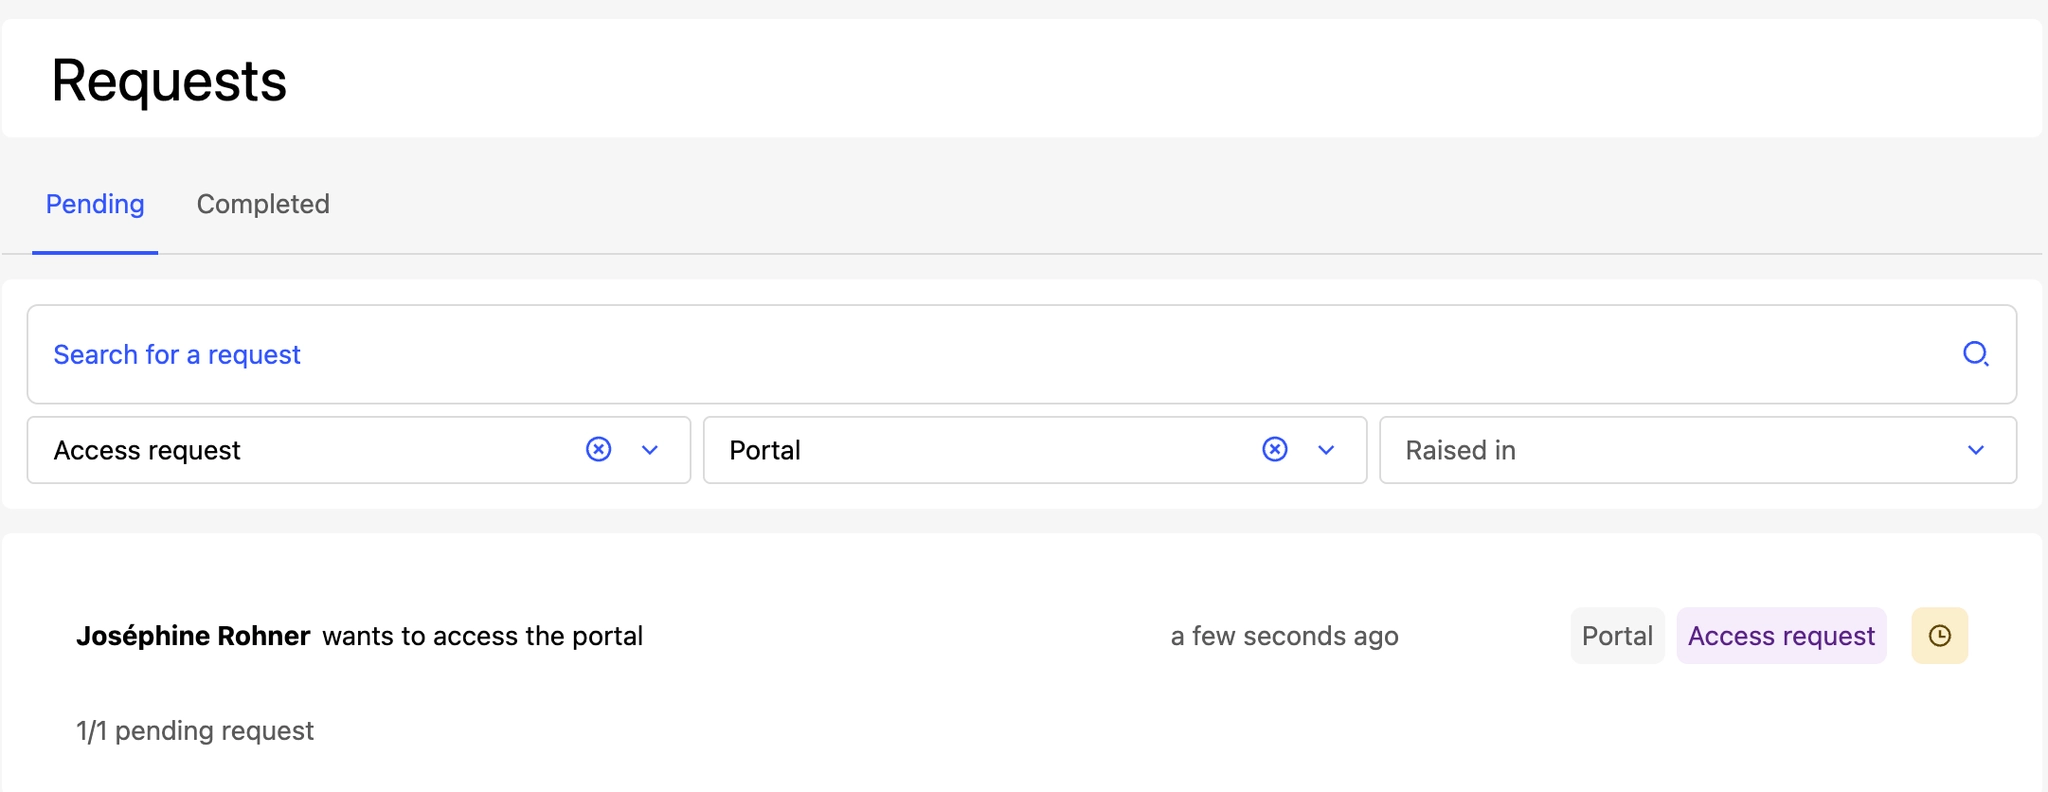
In your back office, go to Requests. The number next to the menu shows how many requests are waiting.
Stay on the Pending tab to see requests you haven't decided yet. The Completed tab shows requests you've already approved or rejected.
If you handle more than one kind of request, use the filters to narrow the list to the Access request category and the Portal type. These are the requests from people who want to access your portal.
Select a request to open its details, where you can see who's asking and any message they included.
Approving a portal request
Approving a request lets the person into your portal. Rather than granting a fixed set of rights, you decide exactly what the new user can do as you approve them.
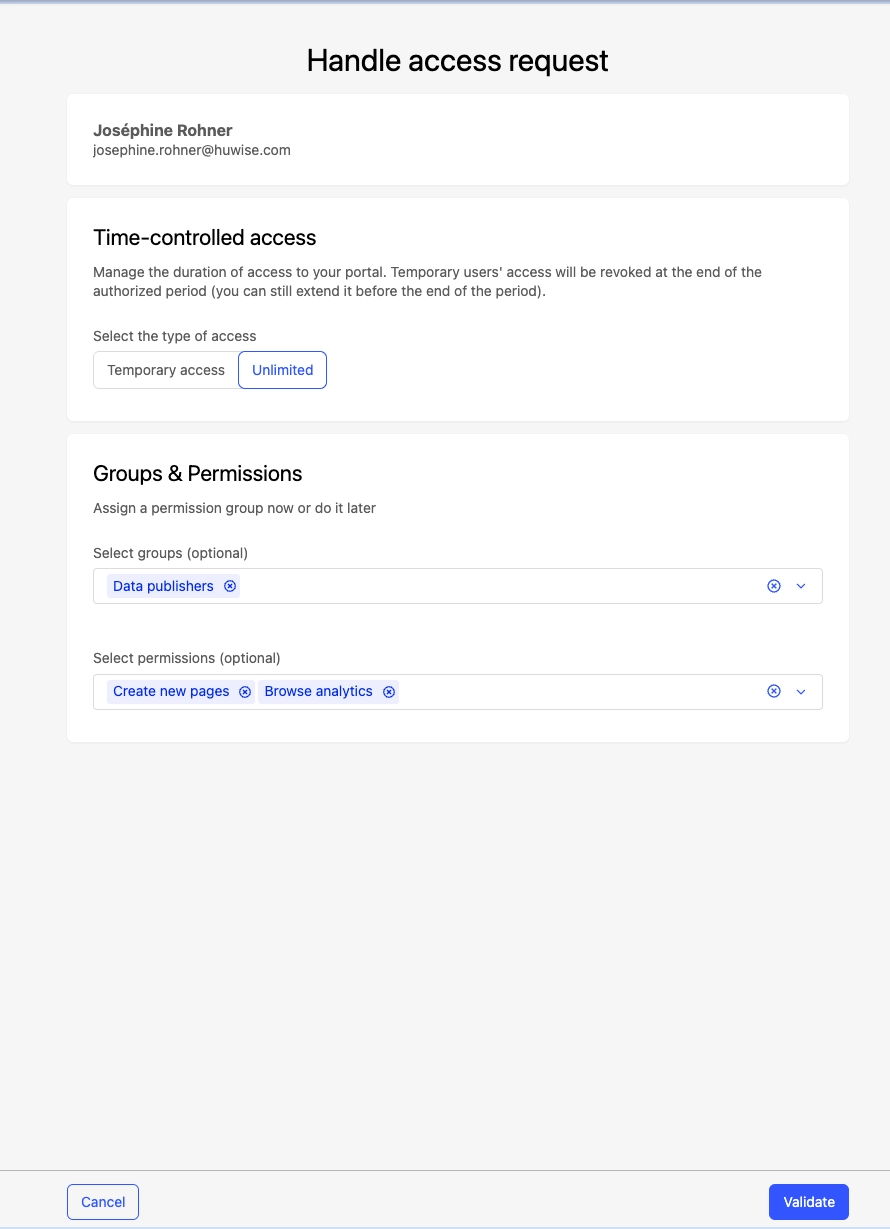
Open the pending request and choose to accept it. The Handle access request panel opens.
Choose the groups the person should belong to, and the permissions they should have. Groups are the easiest way to apply a consistent set of rights — see Managing groups and Managing permissions.
If you want the access to be temporary, set a start and end date. Otherwise the access has no time limit.
Select Validate to confirm. The person becomes a user of your portal with the groups and permissions you chose.
Once approved, the new user appears in your list of portal users, where you can adjust or revoke their access later — see Managing users.
Rejecting a portal request
If you don't want to grant access, you can reject the request and, optionally, tell the person why.
Open the pending request and choose to reject it.
If you'd like, add a short message for the requester. This step is optional; you can leave the message empty.
Confirm the rejection. The request moves to the Completed tab.
If you approve someone by mistake
Approving a request can't be undone from the requests view, but you don't need to worry: an approved person is just a portal user like any other. You can change their groups and permissions, or remove them entirely, from your users list. See Managing users.